Looké Holy Flawless BB Cushion: no powder needed?

Halo, semua! Di post pertamaku di bulan Februari ini, aku mau mengulas sebuah cushion lagi, nih. Semoga belum bosan, ya. 🙂 Kebetulan aku lagi ada kesempatan mencoba-coba cushion baru. Jadi sekalian saja aku share hasil percobaannya supaya bisa bermanfaat juga bagi yang mungkin sedang mencari-cari cushion yang tepat. Buat yang belum baca post aku sebelum ini, aku mengulas Luxcrime 2nd Skin Luminous Cushion. I’d really appreciate if you also give it a read!

Cushion yang akan aku bahas kali ini sebenarnya tidak baru-baru banget, hanya saja aku baru mendapat kesempatan untuk mencobanya sekarang. Kalau tidak salah, cushion ini dirilis sekitar tujuh bulan yang lalu. Seperti yang sudah bisa kalian lihat di judul post ini, cushion yang akan aku ulas kali ini adalah….. Looké Holy Flawless BB Cushion.. yaayy!!

Sebenarnya, sudah agak lama aku berniat mencoba cushion ini, tapi karena pilihan warnanya hanya tiga, aku masih agak ragu mau ambil shade yang mana. Eh, tidak disangka-sangka, seorang teman bermurah hati memberikan cushion milik dia karena dia tidak sengaja punya dua dan shadenya agak sedikit lebih gelap untuk kulitnya. Dan menurutnya, shade ini akan lebih cocok di aku. Maka dia pun mengirimkan cushion ini untukku for free T_T Alhamdulillah..

Without further a do, yuk, kita langsung bahas saja cushionnya. 🙂

Info Produk

Cushion ini dibanderol dengan harga Rp 225.000 dengan berat 13g. Untuk cushion dengan berat yang sedikit lebih ringan daripada cushion pada umumnya, cushion ini cukup pricey menurutku pribadi. Namun, harga ini cukup sebanding kok dengan harga cushion-cushion impor pada umumnya yang berada di kisaran harga dua ratus ribu.

Cushion ini memiliki tiga pilihan warna:

Iris – light beige with yellow undertone
Clio – medium beige with yellow undertone
Diana – honey beige with yellow undertone

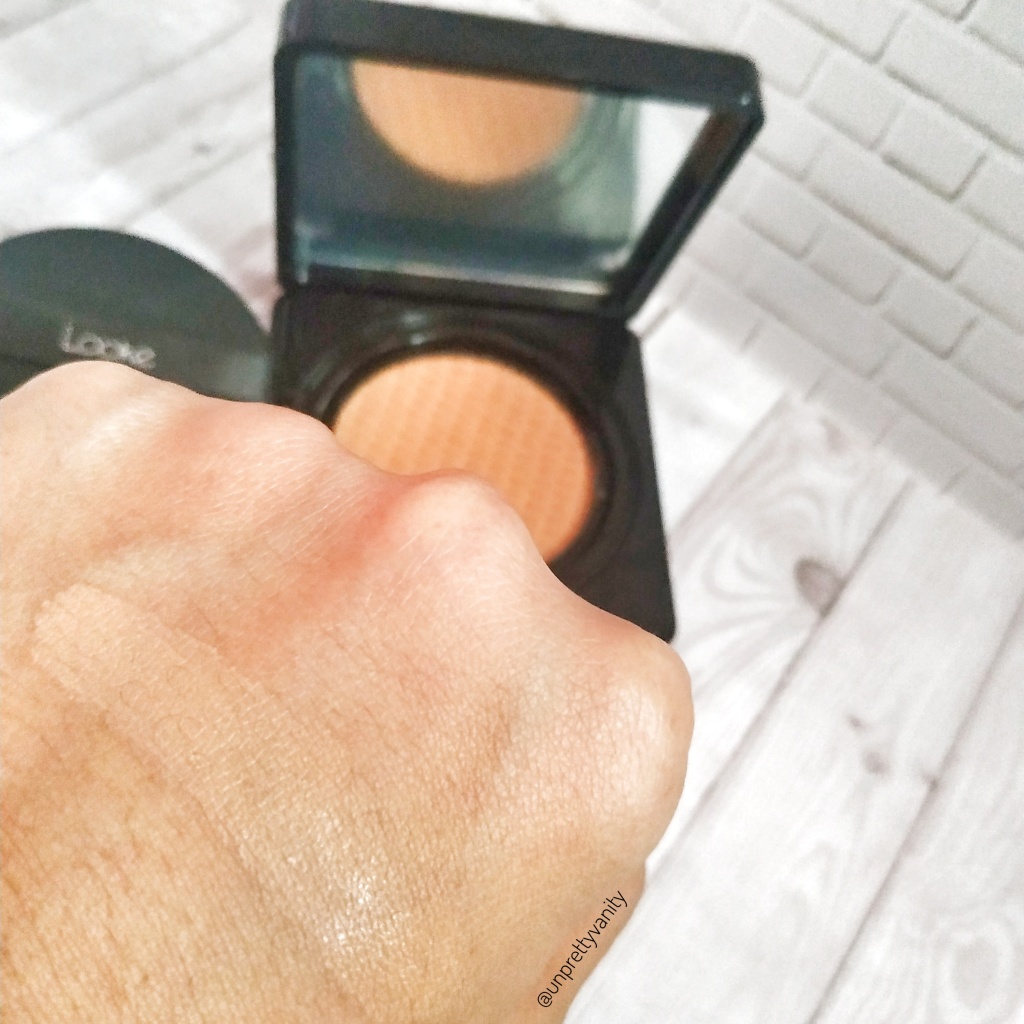
Kalau kalian sudah mengikuti IG atau beberapa post blog aku ke belakang, teman-teman mungkin sudah tahu bahwa kulit aku medium dengan neutral undertone. Shade yang diberikan oleh temanku adalah Clio. Meskipun dari deskripsinya shade ini memiliki yellow undertone, alhamdulillah cushion ini tidak terlihat terlalu kuning di kulitku. Tingkat ke-terang/gelapannya juga sangat pas, jadi aku bisa bilang bahwa shade Clio ini masih masuk ke skin tone aku.

Meskipun pilihan shade Looké cushion ini masih sangat sedikit, untuk kulit wanita Indonesia yang memang sebagian besar yellow undertone, bahkan aku saja yang sebetulnya neutral undertone masih bisa memakai cushion ini, sebenarnya bisa dibilang shade yang ada ini bisa masuk ke range skin tone yang cukup luas. Tapi aku masih merasa teman-teman yang kulitnya lebih ke pink atau cool undertone mungkin belum bisa menemukan shade yang cocok. Di sisi lain, aku sempat membaca di salah satu IG story mereka bahwa mereka akan mengembangkan shade range mereka, jadi let’s keep an eye out!

Shade Clio di kulit medium-neutralku

Klaim produk ini adalah:

Holy Flawless BB Cushion is a weightless foundation with medium-full coverage that conceals the imperfection to help the skin look more flawless with a satin finish. Enriched with Green Tea Extract and Hyaluronic Acid (HA), this product help to maintain the skin moisture, reduce excess sebum, and protect the skin from UV light.

Quoted from https://www.lookecosmetics.com/

Let’s see after my wear-test if they are true to the claim!

Packaging

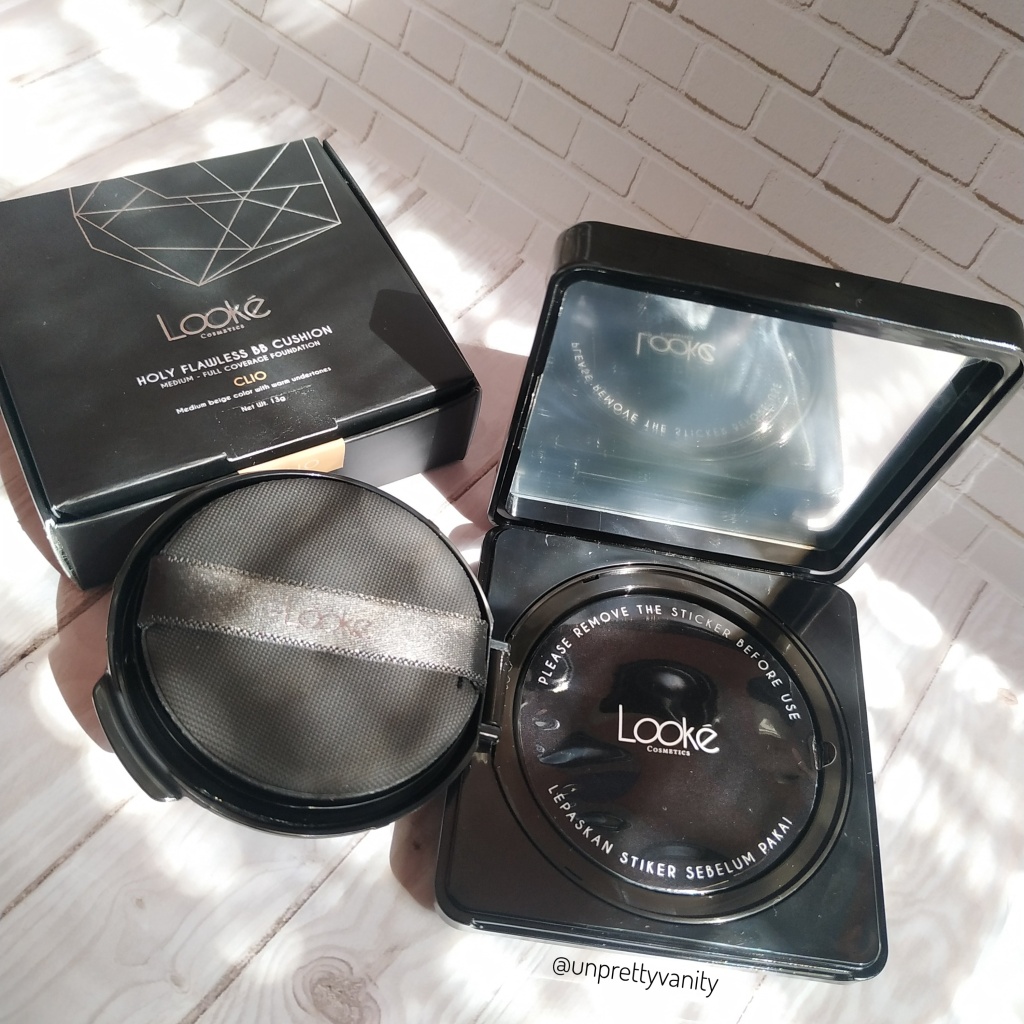
Cushion ini memiliki bentuk persegi dan tingkat ketebalan yang cukup tipis dibanding cushion pada umumnya. Casenya memiliki warna hitam mengkilap yang mudah dibersihkan dan ada tulisan Looké Cosmetics di depannya. Tipe bukaannya adalah magnet, jadi sangat memudahkan dan tidak khawatir merusak kuku.

Cushion ini datang dengan box yang juga compact dengan warna senada yaitu hitam.

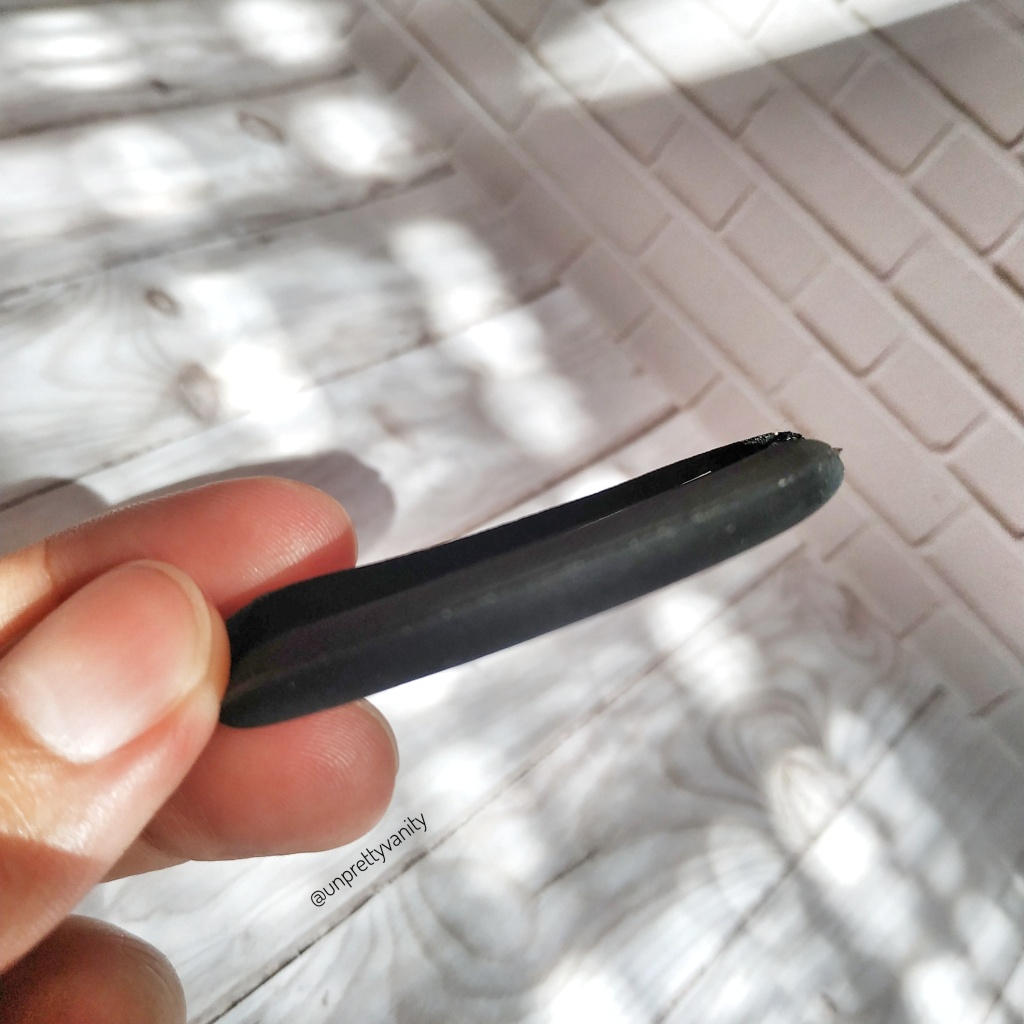
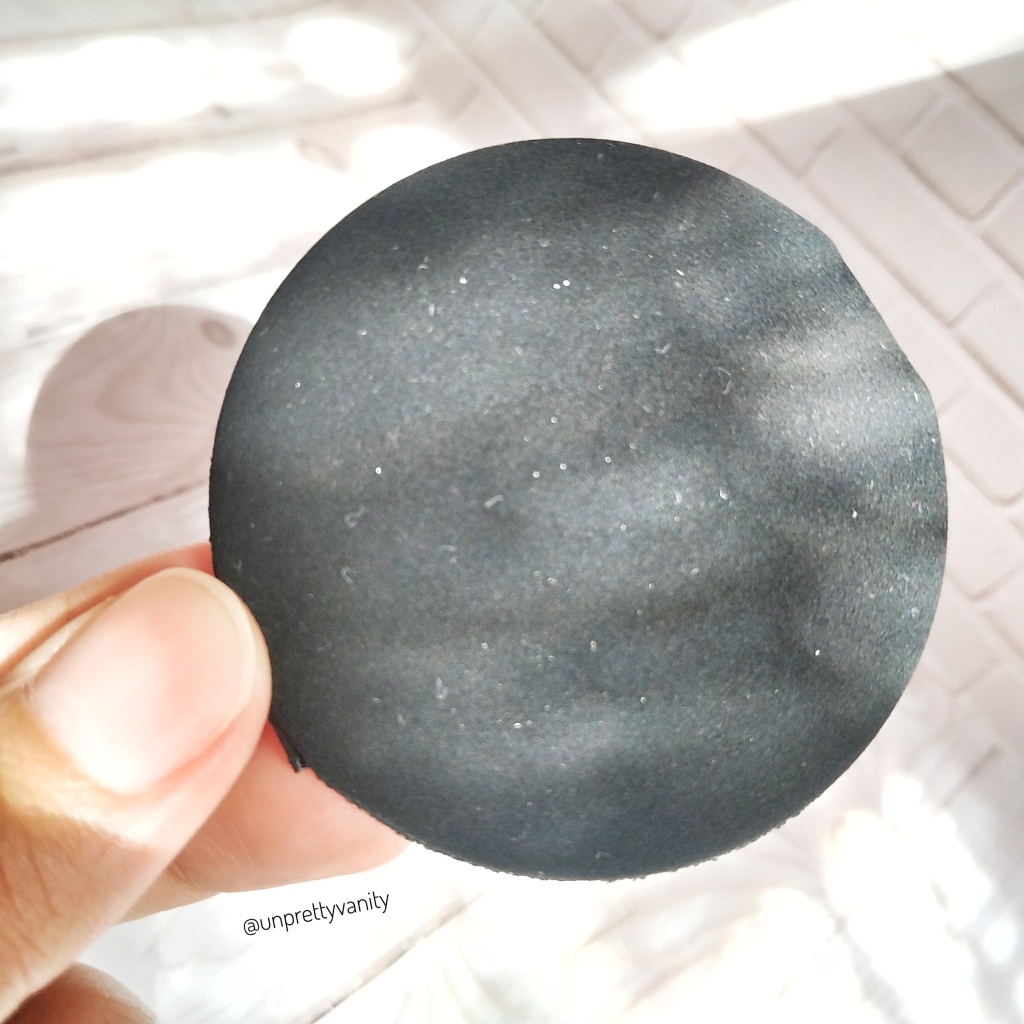
Jika dibuka maka akan ada puffnya dengan pembatas ke cushionnya seperti cushion pada umumnya. Puffnya berwarna hitam jadi tidak cepat terlihat kotor. Dan bagian pegangannya bisa masuk tiga jari, yang mana hal ini makes a huge difference, lho, dibandingkan puff yang hanya muat dua jari. Ternyata jika pegangan puff hanya muat dua jari itu lebih susah mengaplikasikan produknya ke wajah, at least based on my own experience. 🙂

Bagian aplikator puffnya juga lembut dan bagian pinggirnya tidak meninggalkan jejak di wajah saat mengaplikasikan produk.

Overall, aku enjoy sekali dengan packagingnya yang sleek, mudah dibersihkan, dan elegan. Aku juga suka dengan tipe bukaan magnetnya dan puffnya yang juga nyaman dipakai. 🙂

Ingredients

Di laman resminya, Looke menyebutkan bahwa produk ini diperkaya dengan Green Tea Extract and Hyaluronic Acid (HA). Berikut ini full ingredientsnya seperti yang tercantum di laman resmi mereka:

Water, Dimethicone, Isododecane, Titanium Dioxide, Butylene Glycol, Ethylhexyl Methoxycinnamate, Synthetic Fluorphlogopite, Cyclopentasiloxane, Cetyl PEG/PPG-10/1 Dimethicone, Pentylene Glycol, Polymethylsilsesquioxane, Silica Dimethyl Silylate, Nylon-12, Methyl Methacrylate Crosspolymer, Zinc Oxide, Phenoxyethanol, PEG/PPG-18/18 Dimethicone, Dimethicone/Vinyl Dimethicone Crosspolymer, Tocopheryl Acetate, Acrylates/Polymethylsiloxymethacrylate Copolymer, Triethoxycaprylylsilane, Sodium Chloride, Disteardimonium Hectorite, PEG-10 Dimethicone, Aluminum Hydroxide, Camellia Sinensis Leaf Extract, BHT, Hydrogen Dimethicone, Ethylhexylglycerin, Propylene Carbonate, Hydrolyzed Hyaluronic Acid

Quoted from https://www.lookecosmetics.com/

Dari ingredients tersebut di atas, yang merupakan green tea extract adalah Camellia Sinensis Leaf Extract. Dapat temen-temen lihat, Camellia Sinensis Leaf Extract dan Hyaluronic Acid dituliskan cukup mendekati akhir daftar ingredients. Ini menunjukkan bahwa sebenarnya kandungan green tea dan HA-nya bukan penyokong utama dari cushion ini, melainkan memang hanya pengayaan saja, seperti klaim mereka. Jadi meskipun di klaim mereka disebutkan bahwa kedua bahan ini salah satunya berfungsi untuk menjaga dari paparan sinar UV, saranku, temen-temen tetap pakai sunscreen ya sebelum menggunakan cushion ini.

Selain itu, karena produk ini sudah halal MUI, sebetulnya tidak ada ingredients lainnya yang terlalu aku khawatirkan. Kebetulan, wajahku cukup tahan banting sehingga tidak mudah breakout kalau mencoba-coba suatu produk kecantikan baru, jadi tidak ada ingredients yang mau aku call out juga. Sepengetahuanku yang hanya seorang skincare junkie ini, ingredients cushion ini cukup aman karena mereka juga memang mengeklaim bahwa mereka sulfate free, paraben free and alcohol free. On top of that, they are also cruelty free and vegan. Jadi kesimpulannya, selain sudah halal, tidak ada ingredients yang benar-benar membuat aku concern. 🙂

Uji Pemakaian

Yay, sampai juga di bagian yang mungkin paling membuat temen-temen penasaran ya, yaitu uji pemakaian!

Untuk mengingatkan lagi atau mungkin banyak juga yang membaca blog ini untuk pertama kalinya, tipe kulitku adalah normal-to-oily. Secara keseluruhan wajahku normal, hanya bagian ujung hidup dan sekitar ujung hidung saja yang cukup berminyak. Dahi dan dagu tidak terlalu berminyak, kecuali kalau beraktivitas seharian di luar rumah.

Sebelum pertama kali mencoba cushion ini, aku sudah sangat penasaran karena aku sering sekali mendengar beauty influencers yang menyebut-nyebut bahwa cushion ini tidak perlu diset dengan bedak. Saat pertama kali membuka produk ini, aku mencoba mengaplikasikan ke punggung tangan dulu dengan puffnya, dan ternyata, benar sekali, temen-temen! Saat diaplikasikan, dia langsung kering dan mengeset hanya dalam waktu mungkin sekitar sepuluh detik! Wow, aku jadi benar-benar tidak sabar untuk mencobanya di wajah. XD

Pada percobaan di hari pertama ini aku tidak menggunakan primer atau setting spray sama sekali. Begitu pertama kalinya mengaplikasikan produk ke wajahku, aku langsung takjub dengan coveragenya. Sejujurnya, wajahku memang tidak banyak bekas-bekas jerawat yang memerah. Namun aku punya banyak discoloration, seperti bagian bawah mata, sekitar lipatan hidung, dan juga sekitar lipatan mulut, itu agak lebih gelap. Aku juga punya banyak pori-pori besar di sekitar hidung, bawah hidung, dan antara alis. Semua ketidaksempurnaan ini dapat tertutupi dengan baik hanya dengan satu tap.

Selain itu, seperti saat tadi dicoba di punggung tangan, cushion ini langsung kering dan mengeset segera setelah diaplikasikan. Tapi hebatnya, dia tetap dapat diblend dengan baik sehingga tidak patchy. Biasanya, base product yang cepat mengeset itu agak susah diblend dengan produk yang dipalikasikan setelahnya. Tapi, tidak demikian dengan cushion ini. Cushion ini juga tidak langsung creasing di lipatan-lipatan sekitar mataku.

Hari itu aku hanya mengeset sedikit bagian bawah mata dan hidung dengan bedak, dan baru sekitar setelah 4 jam mulai muncul minyak di wajahku. Dan sampai akhir pemakaian sekitar 6 jam, wajahku benar-benar tidak break apart sama sekali, creasing di bawah mata dan smile lines juga sangat minimal. I can safely say that this cushion is a love at first sight ❤

Hari kedua aku mencoba cushion ini lagi. Kali ini dengan full face of makeup, yaitu sebagai mana biasanya kalau aku ingin membuat makeupku tahan lama, yaitu dengan memakai mattifying primer, semprot setting spray (Luxcrime Stay Last setting spray), baru memakai cushion, baking dengan loose powder (Ponds Angel Face), selesaikan makeup, aplikasikan loose powder secara merata, dan terakhir dilock lagi dengan setting spray. Hasilnya, bener-bener flawless seharian. Hari ini aku memakai makeup ini sampai 7 jam dan bener-bener minimal creasing dan minimal oil sampai akhir pemakaian.

Kesimpulan

Setelah dua hari berturut-turut aku mencoba cushion ini, kesimpulanku cushio ini:

  • Lightweight
  • Medium-to-full coverage (pretty full for my personal taste)
  • Matte finish on my normal-to-oily skin although the claim was satin finish
  • Meskipun matte tapi tidak drying dan tidak terasa seperti ketarik-tarik kulitnya
  • Good oil control
  • Cukup long-lasting meskipun tidak diset dengan bedak (apalagi diset!)
  • Cepat mengeset sendiri sehingga lumayan transfer-proof
  • Pretty pricey but so worthy!
  • Needs more shades

*****

Demikian ulasan aku tentang cushion ini, teman-teman. Semoga cukup membantu bagi yang masih ragu untuk cobain, ya! Kalau kamu sudah punya cushion ini, cerita dong bagaimana pengalaman kamu menggunakannya? Apakah dia satin finish di kamu? Kalau kamu masih galau, kira-kira apa yang membuat kamu masih galau? Tanyain aja di komentar di bawah, ya, siapa tahu aku bisa bantu!

Terima kasih yang sudah membaca sampai selesai. Sampai ketemu lagi di post berikutnya. Jangan lupa juga follow blog ini, ya! ❤

Luxcrime 2nd Skin Luminous Cushion: Halal? Not for oily skin?

Hai, semuanya. Tidak terasa, sudah di penghujung bulan Januari 2021, ya. Bagaimana awal tahun 2021 kalian? Semoga semuanya masih tetap sehat, ya, di tengah pandemi ini.

Di post pertama di tahun 2021 ini, aku ingin mengulas sebuah cushion yang baru saja dirilis oleh Luxcrime sekitar seminggu lalu. Aku sudah mencoba memakai cushion ini selama dua hari berturut-turut dengan berbagai kondisi, jadi aku sudah punya pendapat tentang cushion ini.

Info Produk

Cushion ini dijual dengan harga Rp 179.000 dengan berat 10g. Secara berat, cushion ini lebih ringan daripada cushion pada umumnya yang biasanya berisi 15g. Dengan harga dan berat segini, menurut saya cushion ini berada di range menengah – tidak mahal sekali namun juga tidak super murah. Mengingat Luxcrime adalah indie brand, menurutku harganya masih cukup wajar.

Aku sendiri membeli cushion ini dalam set dengan Luxcrime On Fleek Browcara sehingga mendapat potongan harga sebesar 25%. Kebetulan browcara ini sudah ada di wishlistku. Jadi ketika cushion ini diluncurkan dan ada pilihan set ini, tanpa pikir panjang aku langsung membelinya. Nanti aku juga bagikan sedikit, ya, pendapatku tentang browcaranya.

Luxcrime 2nd Skin Luminous Cushion & On Fleek Browcara

Cushion ini tersedia dalam lima pilihan warna, yaitu:

Vanilla – Light skin shade with cool undertone (light neutral)
Honey – Light skin shade with warm undertone (light medium)
Cashew – Medium skin shade with warm undertone (medium neutral)
Chestnut – Dark skin shade with neutral undertone (warm tan)
Toffee – Dark skin shade with warm undertone (warm deep)

Warna kulitku adalah medium dengan neutral undertone. Meskipun tidak ada pilihan yang benar-benar persis dengan kulitku, melihat swatch warna yang tersedia di sosial media Luxcrime dan juga model yang mereka tampilkan, aku langsung memilih shade Cashew, yang juga mereka definisikan sebagai medium neutral. Alhamdulillah shade ini sangat cocok denganku. Meskipun deskripsinya untuk kulit warm, shade Cashew ini tidak terlihat terlalu kuning di kulitku.

Menurutku pribadi, pilihan warna ini masih harus dikembangkan. Lima warna yang telah ada ini tidak cukup terang dan tidak cukup gelap. Dan di masing-masing tingkatan warna, undertone yang ada belum terwakilkan semua. Aku cukup yakin banyak wanita Indonesia yang belum bisa mendapatkan warna yang benar-benar persis dengan kulit mereka.

Klaim produk ini adalah:

  • Buildable coverage
  • Lightweight formula
  • SPF 25 – UVA UVB Protection
  • Fungal acne safe
  • Luminous and smoothed skin appearance
Screenshots are from Luxcrime IG story, edited by me

Nanti kita akan bahas, ya, apakah hasil pemakaianku sesuai dengan klaimnya.

Packaging

Dari segi packaging, menurutku cushion ini unik sekali dengan bentuknya yang persegi dan sangat pipih. Desain di bagian covernya juga cantik dan elegan, warnanya yang hijau emerald dipadukan dengan soft pink juga sangat khas Luxcrime. Aku pribadi suka sekali brand yang keseluruhan produknya memiliki tema serupa seperti ini.

Love the packaging!

Ketika pertama datang, cushion ini tidak disediakan langsung di dalam casenya seperti cushion pada umumnya, melainkan harus kita pasang sendiri. Jadi, dia datang dengan box agak besar seperti ini.

Kemudian jika dibuka, maka akan ada case-nya tanpa cushionnya.

Lalu ketika dibuka lagi tingkat kedua dari boxnya, barulah tersedia isi cushionnya di dalam kemasan terpisah.

Memasang cushion sendiri ke dalam case ini juga cukup memberikan pengalaman yang menarik menurutku. Dan ini menandakan bahwa sangat mungkin mereka meluncurkan isi ulangnya saja di kemudian hari.

Aku juga suka dengan puff-nya. Puff ini cukup untuk dimasukkan tiga jari, dan menurutku ini sangat memudahkan dalam pengaplikasian (karena aku punya cushion lain dan itu puff-nya hanya muat dua jari). Puffnya juga sangat empuk, sehingga ketika kita tepuk-tepukkan ke wajah tidak terasa sakit. Bagian tepi puff juga lembut dan tidak menimbulkan garis-garis di wajah saat mengaplikasikan produk.

Tapi, puffnya juga ada kekurangannya sedikit, nih, teman-teman. Karena warnanya yang putih, baru empat kali pemakaian sampai sejauh ini, puff-ku sudah terlihat cukup kotor seperti ini.

Untuk browcaranya, dia datang dengan box seperti ini.

Di bagian belakang ada cara pemakaian.

Dan sama juga dengan cushionnya, ilustrasi pada packaging dan box browcara ini juga sangat cantik. Meskipun senada dengan ilustrasi cushion, ada aksen seperti goresan alis yang membedakan. I love this kind of small detail!

Aku juga suka dengan aplikatornya yang sangat kecil dan rapat karena ini memudahkan untuk mengaplikasikannya di bulu-bulu alisku yang halus.

Ingredients

Sekarang kita masuk ke bagian paling penting dari sebuah produk kecantikan. Mengapa ini paling penting menurutku, bahkan lebih penting daripada cocok atau tidaknya? Tentunya sebagai seorang Muslim, kita harus memastikan apakah produk yang kita gunakan halal atau tidak.

Luxcrime sendiri mengklaim brand mereka sebagai BPOM, cruelty free, vegan dan halal. Sebelum membeli produk ini, aku sudah sempat mengecek apakah produk 2nd Skin Luminous Cushion dan On Fleek Browcara ini telah terdaftar di www.halalmui.org. Untuk browcaranya sudah terdaftar alhamdulillah, namun untuk cushionnya belum terdaftar.

Karena belum terdaftar di website halal MUI, aku berikhtiar untuk mengecek juga ingredientsnya untuk lebih meyakinkan. Dari ingredients yang tertulis, ada satu ingredients yang patut kita perhatikan jika ada di sebuah produk, terutama produk kecantikan, yaitu ‘sodium hyaluronate’ (kedua dari terakhir).

Nah mungkin kali ini aku tidak akan membahas terlalu detail tentang ingredients ini. Tapi secara singkat saja, sodium hyaluronate ini bisa berasal dari jaringan hewan mamalia, yang tentunya jika hewan tersebut tidak disembelih sesuai syariat Islam, hukumnya menjadi haram. Untuk lebih detailnya tentang bagaimana sodium hyaluronate ini dibuat, teman-teman bisa membaca salah satunya dari artikel ini, ya. Tentunya akan lebih baik jika teman-teman googling sendiri untuk tahu lebih banyak lagi.

Namun, sodium hyaluronate juga bisa dibuat halal. Terbukti dengan adanya halal sodium hyaluronate. Dan juga kebetulan aku punya satu produk skincare yang sudah halal MUI dan di ingredientsnya ada sodium hyaluronate. Hal ini membuktikan bahwa sodium hyaluronate juga bisa halal.

Oh ya, ini juga ada artikel tentang bahan-bahan yang jika ada di kosmetik patut kita waspadai kehalalannya. Masih banyak juga artikel serupa lainnya, kalian bisa googling sendiri, ya.

Untuk meyakinkan lagi, aku pun bertanya ke CS Luxcrime di Shopee (karena aku membeli produk ini dari Shopee), apakah cushion ini mengandung bahan hewani. Dan CS tersebut pun menjawab bahwa tidak terkandung bahan hewani dalam cushion ini.

Screenshot my convo with Luxcrime CS

Maka, dengan claim brand Luxcrime yang vegan dan juga hasil bertanya ke CS mereka dan dengan kenyataan bahwa sodium hyaluronate bisa dibuat halal, maka bismillah, aku pun membeli produk ini. Wallahu’alam, semoga Allah meridhoi ikhtiar ini, ya. Amin..

Uji Pemakaian

Nah, sekarang kita masuk ke bagian yang paling ditunggu-tunggu, yaitu Uji Pemakaian. Yeay! Terima kasih yang sudah membaca sampai di sini tanpa skip! Hehe..

Oh ya, aku belum menjelaskan tipe kulitku, ya. Tipe kulitku adalah normal-to-oily. Secara keseluruhan wajahku normal, hanya bagian ujung hidup dan sekitar ujung hidung saja yang cukup berminyak. Dahi dan dagu tidak terlalu berminyak, kecuali kalau beraktivitas seharian di luar rumah.

Hari pertama uji pemakaian, di setengah wajahku aku menggunakan mattifying primer terlebih dahulu dan di setengah wajahku aku tidak menggunakan primer. Kemudian setelah mengaplikasikan cushion, aku set seluruh wajahku dengan bedak, karena memang itu yang selalu aku lakukan (aku jarang tidak mengeset wajahku dengan bedak). Lalu setelah menyelesaikan makeupku, di setengah wajah yang tadi aku pakaikan primer, aku set juga dengan setting spray, dan di setengah wajah yang satunya tidak. Aku ingin melihat apakah ada perbedaan signifikan jika pemakaian cushion ini dibantu dengan primer dan setting spray dan jika tanpa apa-apa.

Satu hal yang sangat aku sadari dari pemakaian pertama ini adalah, cushion ini memang sangat hydrating dan terasa cukup encer. Akibatnya, bagian sekitar mataku yang memang banyak garis halus lipatan kulitnya agak susah dibuat smooth. Tidak peduli berapa kali pun aku rata-ratakan dengan puff ataupun jari, dia creasing lagi setelah beberapa detik. Padahal, sebelum diset dengan bedak, bagian sekitar mata itu harus smooth dulu, kan, supaya tidak semakin creasing setelah dipakai seharian. Akibatnya, setelah berhasil diratakan dengan jari, aku harus cepat-cepat set dengan bedak sebelum keburu creasing lagi.

Masih karena terlalu encer ini, sebelum diset dengan bedak, cushion ini tidak terlalu cepat mengeset sendiri. Jadi ketika baru diaplikasikan lalu jariku tidak sengaja menyentuh wajahku, bagian yang tersentuh jariku tadi langsung terangkat produknya. Jadi, cushion ini memang bukan tipe yang bisa dipakai tanpa bedak dan harus cepat-cepat diset agar tidak transfer.

Tapi… Harus aku akui cushion ini memang memiliki coverage yang sangat baik! Aku tidak memiliki terlalu banyak bekas jerawat. Namun warna kulit di wajahku lumayan tidak merata, seperti bagian bawah mata, sekitar hidung dan mulut itu lebih gelap daripada yang lainnya. Juga pori-pori di sekitar hidungku cukup besar. Aku bisa bilang bahwa discoloration di wajahku dapat diratakan dengan baik dan pori-pori besarku juga tersamarkan. Dan aku sudah tidak memakai concealer lagi. Juga, cushion ini terasa sangat ringan seperti tidak memakai apa-apa.

Hari itu aku tidak ke mana-mana tapi aku beraktivitas seperti biasa di rumah, seperti beberes rumah, main dengan anak, makan, cuci piring, dsb. Aku juga lagi berhalangan, jadi aku tidak solat dan bisa menguji pemakaian cushion ini tanpa terkena air wudhu. Oh ya, teman-teman, kalau bisa sih, saat kita berwudhu, dihapus dulu ya, makeupnya. Supaya air wudhunya benar-benar kena ke kulit kita dan sah wudhu serta solatnya. 🙂

Setelah pemakaian selama 3 jam, ujung hidungku sudah mulai berminyak, baik yang memakai primer dan setting spray maupun yang tidak. Sejujurnya aku merasa ini agak aneh, karena biasanya primer dan setting sprayku cukup mampu menahan minyak sampai minimal 6 jam. Oh ya, bedak yang aku pakai adalah Ponds Angle Face (yang botolnya warna biru-putih) dan setting spray yang aku pakai adalah Luxcrime Stay Last. Setting spray ini sudah cult favorit banget ya (dan sudah halal MUI!), sudah terjual sangat banyak dan memang aku sendiri sudah membuktikan bahwa dia memang mampu mengunci makeup seharian. Bahkan saat aku keluar dan memakai masker, itu yang transfer ke masker sangat sedikit dan yang luntur dari wajahku juga sangat sedikit.

Oke, balik lagi ke uji pemakaian cushion. Hehe. Setelah sekitar 7 jam, aku sudah agak capek dan mengantuk, jadi aku mengecek untuk terakhir kalinya sebelum menghapus makeupku hari itu. Setelah 7 jam, wajahku sudah sangat oily mengingat aku tidak banyak beraktivitas berat seharian itu. Dan tidak ada bedanya antara sisi yang diset dengan primer dan setting spray dan sisi yang tidak memakai apa-apa. Area di sekitar mataku sudah creasing semua. Bisa dibilang percobaan pertama ini memberikan hasil yang tidak terlalu memuaskan in terms of longevity. Aku jadi bertanya-tanya sendiri apakah primer dan setting spraynya kurang banyak, ya..

Karena masih penasaran, aku pun mencoba lagi keesokan harinya. Kali ini aku pakai primer di seluruh wajah dan setting spray yang agak lebih banyak. Aku juga memakai teknik baking untuk powdernya (kalau kemarin, kan, hanya ditap-tap saja bedaknya). Untuk produk yang dipakai masih sama dengan yang kemarin. Hari kedua ini aku juga full beraktivitas di rumah seperti biasa. Aku juga uji pemakaian sekitar 7-8 jam.

Alhamdulillah, setelah perbaikan teknik pemakaian, hari ini base wajahku bagus seharian! Terbukti dengan baking, cukup baik untuk membuat cushionnya stay in place. Dan setting spray yang lebih banyak berhasil menahan minyak lebih lama. Setelah 7-8 jam pemakaian hari ini, wajahku tidak seberminyak kemarin dan area di sekitar mata juga tidak creasing terlalu parah.

Dari sini aku bisa melihat bahwa untuk kulit normal-to-oily sepertiku, aku benar-benar harus mempersiapkan kulitku dengan primer yang tepat dan mengeset dengan bedak dan setting spray dengan baik. Kalau tidak, cushion ini bakal buyar di wajahku. Berarti, cushion ini bukan cushion yang bisa aku pakai dengan casual dan kalau aku lagi tidak ingin terlalu banyak menggunakan makeup. Aku juga jadi meragukan ketahanan cushion ini untuk teman-teman yang jauh lebih oily daripada aku.

Ulasan Singkat Browcara

Sebelum ke kesimpulan akhir, aku mau memberikan ulasan singkat tentang On Fleek Browcara-nya dulu, ya.

Browcara ini tersedia dalam 3 shades: Crystalline (clear), Woody (light brown), dan Mocha (deep brown). Aku pilih yang shade Mocha.

Setelah mencoba juga selama 3 hari, aku bisa membuktikan bahwa browcara ini bener-bener bisa membuat alis kita tegak berdiri meskipun diterpa badai! Bahkan, ada satu hari aku cuci muka tapi lupa menghapus browcaranya, dia tetap stay in place. Totally highly-recommended, apalagi mengingat ini produk lokal, sudah halal MUI (bisa dicek di web www.halalmui.org), dan harganya juga cukup terjangkau (RP 95.000 dan mereka sering diskon 10% di official store Luxcrime di Shopee).

Sedikit tips dariku, ketika mengaplikasikan browcara ini, usahakan jangan terkena kulit, karena kalau kena agak susah dibersihkannya dan alisnya jadi terlihat sangat tebal seperti Shinchan. Jadi hati-hati di bagian ini, ya.

Kesimpulan

Nah, jadi kesimpulanku untuk kedua produk ini adalah..

2nd Skin Luminous Cushion:

  • Lightweight
  • Pretty good coverage
  • Hydrating
  • Luminous finish
  • Menyamarkan tampilan pori-pori besar
  • Tidak crease-proof (harus di-bake dengan bedak dan menggunakan setting spray cukup banyak)
  • Tidak transfer-proof (sebelum diset dengan bedak masih sangat bisa transfer)
  • Tidak long-lasting
  • Tidak oily girl friendly
  • Need more shades
  • Semoga segera halal certified 🙂

On Fleek Browcara:

  • Kuas kecil memudahkan aplikasi di bulu alis yang halus
  • Sangat kuat menahan alis stay-in-place
  • Water-proof
  • Long-lasting (tidak akan pudar deh kayaknya kalau tidak dihapus)
  • Jika terkena kulit agak susah dibersihkan (saking kuatnya)
  • Sudah halal MUI 🙂

*****

Jadi, bagaimana, teman-teman, apakah kalian akan beli cushion atau browcara ini? Kalau iya, shade mana yang akan kalian beli? Apa yang paling membuat kalian penasaran akan cushion dan browcara ini? Komen-komen di bawah, ya!

Baiklah, segitu saja untuk post hari ini. Semoga bermanfaat untuk semuanya. Kalau ada informasi yang salah, mohon dikoreski ya!

Last but not least, I found this quote from the box the cushion came in pretty inspiring! ❤

Sampai jumpa lagi di post berikutnya. 🙂

Colourpop Blush and Lite Stix Review

Hello, my friends!

Today, I’m sharing my review of Colourpop Blush and Lite Stix, which I bought back in December last year. They are not new by any means, they have actually been on the market for around 6 months, I think. I just bought them recently because of my low-buy rules that stated I can only buy new items on June and December, so these are part of my December haul.

For the last two months, I’ve been playing around with them, trying different ways to apply them to be able to find the best and most effective way. And today, I finally wrapped up my thoughts about them and am ready to share it with you!

General Information

our creamy, dreamy, first ever blush stix are the easiest to use blush stick ever. glides on the skin, blends effortlessly, and easily builds colour to your heart’s desire. the lightweight, natural, skin-like finish plays well when layered and doesn’t disturb your makeup. take it with you anywhere for on-the-go application – just dab, blend, and glow!

Colourpop.com

They retail for $8 each, but can be purchased in a bundle. There are several different kinds of bundles available on Colourpop website. I bought this one, called Rose To The Top bundle, which consists of two blushes: Invite Only and Roosevelt, and one highlight: Acting Up. This bundle retails for $22, but I bought them when they were on sales for 30% off. One stick contains of 8 grams of product, which is actually almost twice the amount of their super shock blushes with the same price.

Packaging

They, obviously, came in stick forms, with plastic packaging. They are light-weight and slim, so I find them practical and easy to travel with. They don’t come in fancy luxurious packaging but I don’t mind it at all. I prefer cute, fresh and youthful look like this. The cap is a click-closure, not a screw-top, if that makes sense (don’t know how to explain it better in English ><) and it’s pretty secure to bring while traveling. I have no worries that the cap will come off accidentally.

Texture and finish

These are not my first cream blush and highlight products but actually my first ever that come in sticks, so please keep that in mind as I don’t have previous experience to compare them with. When they arrived, two of them came a bit melted but still pretty intact. It also didn’t affect the performance of the product itself. They can still be applied as easy as the one that came perfectly in shape.

You can see the second and third ones from the top look melted, while the top one looks still intact

Just like what they claim on their website, these are very creamy and glide on easily on the skin. The blush in Invite Only actually has a bit of sheen to it. They are not chunky glitters so if you hate shimmery blush, it’s not like that at all. When it’s applied on the skin, it just makes my skin looks healthier and fresher. It’s like my skin is naturally glowy, which I really like.

On the other hand, the blush in Roosevelt doesn’t have any sheen at all, but it’s not matte either. It looks very natural so when I’m wearing it, it’s like my skin is naturally blushing. The color is also unique. I can’t really describe it, because on the stick it looks brown but on the cheeks, it looks so natural especially on my medium skin.

At first, I was afraid the highlight in Acting Up would look too dark on my skin. Thank goodness, it doesn’t at all. I was actually sold by Kathleen Light’s review of this particular highlight shade. She raved it on her review video and I’m not disappointed at all! The highlight looks so natural when perfectly blended. It melts completely into my skin, makes my skin looks glowy from within. I personally can use it as highlighter or blush topper, but for you who have lighter skin tone, you can only probably use it as a blush topper.

Shade names from top to bottom: Roosevelt, Acting Up, Invite Only
The shades after blending. You can see Invite Only has a little bit of sparkles.

Application

Now, this is the challenging part XD. The premise of these products is for us to apply on-the-go, which means we want them to be super easy to apply, without any tools other than our fingertips. So the first time I tried to apply them, I first swirled my finger on them and then I dabbed and blended them onto my skin using my fingertips. Sadly, they didn’t show up very well with this method. I tried to build the color, they finally showed up, but not in the usual pigmentation that I want from my blush. I picked up the darkest shade in the collection and I have medium skin tone, so I was a bit disappointed with the pigmentation when using this method. Maybe if you like sheer blush, you’ll have no problem with it.

Next time, I tried to dab them directly onto my cheeks, and then blended them using my fingertips. This method didn’t deliver different result than the previous one. So I was still a bit disappointed. But, these two methods worked well for the highlight! The highlight showed up nicely and easily. However, I still haven’t given up on the blushes. I must find a way to apply them!

I then tried to apply them with a buffing brush. I swirled the brush on the product first and then dabbed and blended them onto my cheeks. Finally, this was the pigmentation that I want!! The blush showed up nicely just from the first application without me having to build it up. And the highlight, I found both using fingertips and a brush work just as well, but when it was applied using a brush, it looks even more melted onto my skin, so I personally prefer this method better!

The buffing brush that I use

The Performance

So far, I never worn them more than 5 hours. I tried applying them directly onto my skin and on top of a base product, and I found them to stayed on better on top of a base product. On direct skin, I think they faded away in just 3 hours. On top of a base product, be it a foundation or a tinted moisturizer, I found them to be pretty intact for at least 5 hours.

Final Thoughts

I LOVE the shades, the texture, and the finish of them. Really, no complaint at all. However, they’re not my holy grail yet. I wanted to be able to apply them only with my fingertips, sadly it’s not the best way to apply it for me. I can certainly bring the buffing brush to apply them if I’m taking them with me when I’m traveling, but it kinda cancel the practical reason of me buying them in the first place. Would I buy other shades? I don’t think so, I think I’m good with all I have now!

That’s all my review for these products, guys! Are you interested in them? Or did you buy some of them already? How do you like them? What’s the best application method according to your experience with them? Is there any other shades you recommend me to try? Please comment below, ok?!

See you when I see you!

2020 Low-Buy and Empty Project

Hey, all!

I can’t believe it’s that time of the year again! Another year, another goals! Well, actually, I believe to start something good we don’t have to wait for a new year, we can just start whenever we want to. But, it’s true that it’s easier to start doing something in a time where we can easily monitor or evaluate our progress, and new year it is!

Firstly, I want to start this post with a reflection of what I’ve done last year. Last year, I decided to do a low-buy 2019. This low-buy was applied to not only beauty products, but also clothing, home decor, amenities, etc. My rules were simply I was only allowed to buy replacements and I can only buy new stuffs on June and December with the total $100 budget each of those two months for all the things I want to buy, with some exceptions. The exceptions were another $100 budget for beauty products and a Fossil bag that I really wanted (regardless of its price) that I asked my mom to buy for me on her trip to Europe. My mom did buy me the bag (yeay!) but she didn’t have time to buy me the European beauty products, so I transferred the budget to my purchase schedule. So, did I manage to fulfill my 2019 goals?

I bought some new stuffs on May with the total of around $200, and bought some more new stuffs on November during Black Friday sales and on December during the year-end sales with the total of around $170. So, I can safely say that I managed to hold out my desire to buy new things for most of the months I wasn’t allowed to. On my first purchase of the year, I managed to limit myself with the pre-determined budget, but on my second purchase, I admit that I just want let myself free. It was so torturing to hold out by the end of the year so just I gave up. I didn’t buy any new home decor, but I received some as gifts from my family and friends. I also didn’t take any note of clothing that I purchased this year, so I failed in this matter 😦

So then I reflected, what made it was so difficult to hold out? After evaluating myself, I realized that it was difficult because I didn’t make any goals related to what I have and I didn’t try my best to use them. Therefore, this year, I add my focus. I want to not only hold out my purchase, but also to really use what I already have in my collection. Hence, this year I will do not only a low-buy like last year, but also an ’empty’ project!

2020 Low-Buy Rules

This year’s rules are going to be:

  • The rules are only applied to beauty products
  • Replacements-only purchase from January to October
  • Purchases of new stuffs are only allowed on November and December with maximum budget of $150
  • Exception: makeup brush, Colourpop Flutter By palette, one beauty box subscription. I’ve been meaning to buy a new makeup brush set because currently I have only one brush for each brush category. So after I wash and dry them, I always use them immediately. Therefore, all of them are so worn off right now. I need to buy a new set so I can use them alternately. As for Flutter By palette, I wanted to pick it up with my last CP order, but it’s sold out at that time. I might pick it up the next time it’s restocked (and on sale 😁). And lastly, there is one beauty box subscription I’ve always wanted to try since last year, and I think this year I’ll try to cave in. I’ll only subscribe for one month, tho, because I just want to test the water.

That’s it! I actually wanted to restrict some items I’m allowed to buy, but this year I want to focus more on the Empty Project, which I will elaborate more on the next section. So I just want to go easy with myself this year. I don’t want to make goals that I can’t fulfill and torture me, because then I will not enjoy doing them!

So without further a do, let’s move on to the more exciting part (at least for me), which is the Empty Project details!

2020 Empty Project Details

To get the whole idea of what I actually have in my collection, I started this project by inventorying all of my makeup collection. And the result shocked me >.< I indeed have much more that I actually need. Especially, I’m not an MUA, I’m just a regular girl who enjoy playing with makeup. I wrote all of my makeup collection like this:

1/9 page of my makeup inventory 🙈

In total, I have approximately 179 makeup items, and those are only makeup. I haven’t listed my skincare collection, but, I don’t have that many skincare collection to begin with. I maybe only have one or two items per category of skincare. So far, I don’t have hard time using up my skincare products because I’m using them regularly. Therefore, I don’t plan to inventorying my skincare collection because I’m pretty sure I’ll finish them anyway.

Among these 179 items, I chose 20 items that I really want to finish by the end of this year. I call this list as ’20 Empties in 2020′. And here are those items:

20 Empties in 2020 list
20 Empties in 2020 products

Those items I chose because I have them for too long now and I actually so close in finishing them but I keep forgetting them because I recently found new items I like more. As I said before, this year I want to start easy because it’s the first time I’ll do an Empty Project and I don’t know my endurance in finishing makeup items yet.

As you can see from my inventory above, I’ll also take note of the usage of each products. So my goals this year would be:

  • Use up all products in ’20 Empties in 2020′ list
  • Use all products in ’20 Empties in 2020′ list for at least three times a month
  • Use all lip products in ’20 Empties in 2020′ at least once a day
  • Use ALL products in my collection at least once this year
  • By the end of this year, products in ’20 in 2020′ list that are not finished will be de-cluttered because I have them for too long at this point, and there’s no point in holding them up any longer

That’s all! So simple, right? I don’t have any plan to pan any eye shadow pan yet because for now, I want to see how I’m doing all the goals above. If, for let’s say six months, I do better than I expected, it’s possible to add more goals down the line!

So that is it for my 2020 Low Buy and Empty Project rules! How about you, guys? Are you doing similar project this year? If you write about it on your blog, too, kindly link it below! I’d love to see other people’s project as it gives more inspiration to me and we can also cheer on each other along the way!

Until next time!

Colourpop Pretty Fresh Line Review

Hi, all!

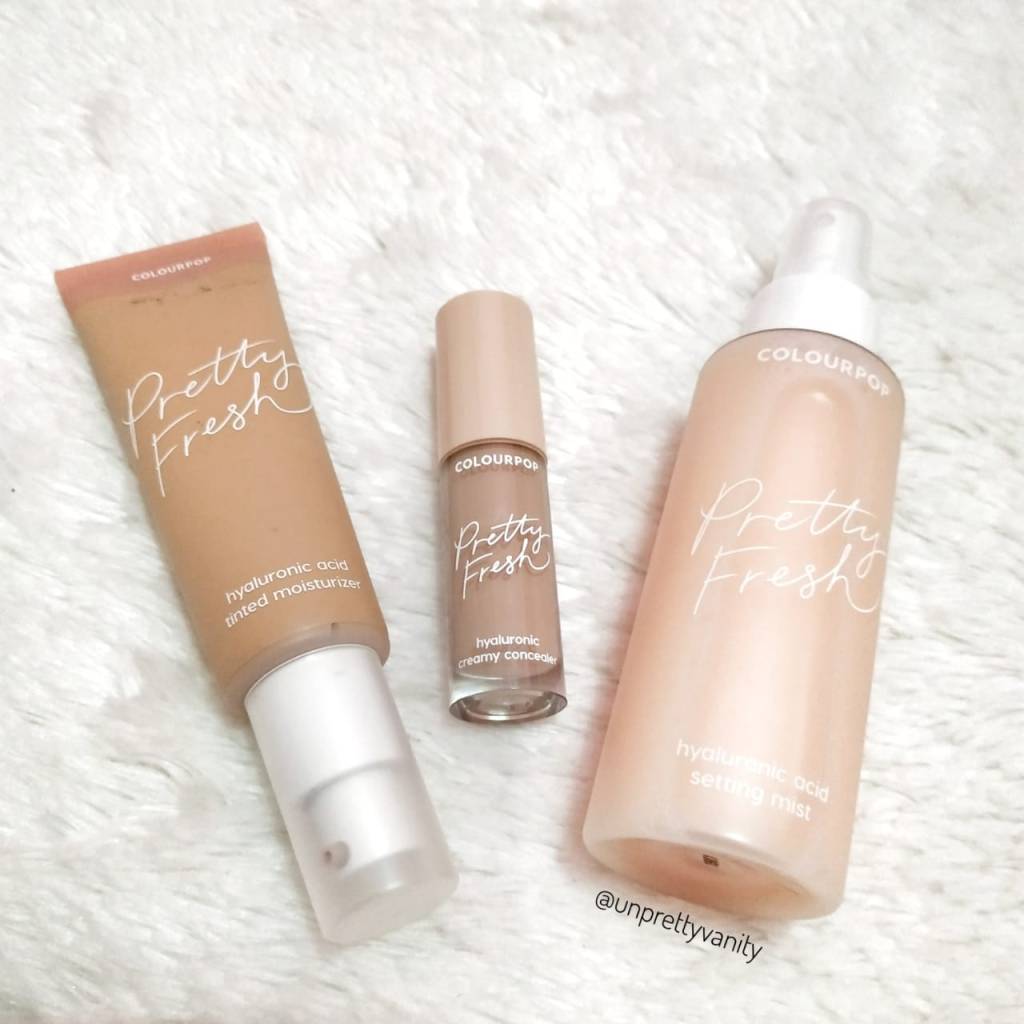
In today’s post, I want to share with you my in-depth review of Colourpop newly launched line, which is called “Pretty Fresh” line. Just like its name, Colourpop advertised this line as a line that consists of products that promotes healthy-looking, fresh and natural-finish skin. All products are infused with hyaluronic acid (aka HA) known to hydrate and support healthy looking skin, and coconut water known to support hydration and skin softness. The full line consists of a primer, a tinted moisturizer, a creamy concealer, a setting mist and two blending sponges. Pretty much all you need in a base makeup!

When I first heard that they were releasing this, I happened to be in the market for a tinted moisturizer. These days I don’t feel like putting too much products on my skin, so I was very excited and felt like this line was launched in a perfect timing for me!

After doing some research and watching many reviews, I decided to pick up only the tinted moisturizer, the creamy concealer and the setting mist, and here’s the reason why.

The primer contains coconut oil as the fifth ingredient mentioned on the ingredients list, which means it is the fifth most contained ingredient in it. Coconut oil, although has so many benefits for our body and hair, is infamous as (one of) the suspect behind clogged pores. After years of trial and error, I just recently found a perfect skin care routine for my skin and have been loving my skin since, so I don’t feel like damaging my skin just because I wanted to try something new. I’ll just stick with products I know work well for me. And FYI, other products in this line don’t contain coconut oil so you can pick them up with no worry!

I didn’t pick up the blending sponge because I currently have a blending sponge that I really like. It’s local made and costs only USD 2. I don’t have any justification to replace it just yet.

I hope you’re OK if I only review the items I picked up!

Items I picked up
Blending sponge I’m currently using

My preferences and skin type

I think it’s important to inform you first about my preferences and skin type. I have a pretty normal skin: not too oily and not dry at all. My skin is not acne-prone, but I have some spots with acne scars because I do have hormonal acne. My skin also has some textures and quite large pores. With this condition, I like matte and dewy finish makeup equally. I also don’t mind going out even without makeup. I wear full-coverage makeup only on special occasions. On a daily basis, I only wear light to medium-coverage makeup.

I have medium-neutral skin tone. The shades I picked up were Medium 10N for the tinted moisturizer and Medium 85N for the creamy concealer. And below are my other foundation and concealer shades for your reference:
Estee Lauder Double-Wear Stay-in-Place SPF 10: 2N2 Buff
Wet n Wild Photofocus Foundation: Buff beige
Colourpop No Filter Stix Foundation: Medium 81N
Colourpop No Filter Concealer: Medium 26

Wear-Test

First of all, I want to share with you my wear-test of these products. I’ve been wearing these products routinely for the past 2 weeks, and I applied them with different method and product combination to find the best and most suitable way for me to wear them.

1st Wear-Test

(ALL PRODUCTS, NO PRIMER, USING FINGERS, BAKED WITH LOOSE POWDER)

This day I wore the tinted moisturizer, the concealer and the setting mist without applying my Wet n Wild Photofocus matte primer, and I applied all of the products by using only my fingers because I was in a hurry that day and can’t be bothered to damp my blending sponge. The tinted moisturizer applied nicely and easily using fingers, but the concealer was (just like it claims) very full coverage and creamy and it was a bit hard to applied by only using fingers. After that, I baked my face just like usual with my Innisfree no sebum loose powder. After dusting-off my powder, my face looked completely matte, but after spraying it with the setting mist, somehow the natural-finish was brought back.

During the day, I unconsciously touched my face several times, and I noticed the base was shifted so my face looked patchy on different spots. I wore this base for at least 8 hours, and by the end of the day, my under-eye area was creasing so bad, the products around my nose and my chin was a bit worn off.

This first trial was definitely not a very satisfying one for me.

2nd wear-test

(ALL PRODUCTS, WITH PRIMER, USING SPONGE, BAKED WITH LOOSE POWDER)

The next day I applied my matte primer before wearing the tinted moisturizer. I applied the tinted moisturizer still with my fingers first, and than dabbed it with my sponge to blend it out. After that, I applied the concealer also with a sponge. This time I can clearly see that the concealer applied so much faster and easier with a sponge. And this concealer is really full coverage until a little goes a long way. After that I applied the rest of my makeup, baked my under-eye area with my loose powder, and finished it with the setting mist.

I wore this makeup for almost 12 hours this day. And wow surprisingly, by the end of the day, my under-eye area was not creasing at all! The product on some parts on my face (like my nose and my chin) was still worn off, but I can say it worn off nicely as long as we didn’t touch our face too much.

3rd wear-test

(TINTED MOISTURIZER, SETTING MIST, WITHOUT PRIMER, USING FINGERS, BAKED WITH LOOSE POWDER)

This day, I just wanted a casual makeup day because today I didn’t have many things to do, so I applied as minimal products as possible. I didn’t apply my primer and the concealer, and apply the tinted moisturizer with only my fingers. After that I applied the rest of my makeup, baked my face (as usual), and sprayed my face with the setting mist.

I only wore this makeup for about 6 hours and by the end of the day, my make up still looked very decent. I didn’t notice too much products worn off of my face. So I can safely say that the tinted moisturizer applied nicely for 6 hours even without a primer.

4th wear-test

(TINTED MOISTURIZER, SETTING MIST, WITHOUT PRIMER, USING FINGERS, NO BAKING)

This time, I wanted even more casual makeup day. I did my makeup without primer, and I wanted to try the tinted moisturizer without baking, so I only set it with a pressed powder and the setting mist.

This day I wore my makeup also for around 6 hours. And (as I mentioned above) even though my skin is pretty normal, I still produce some oil by the end of the day. Because I didn’t set my face with baking method, I saw a decent amount of sheen on my face at the end of this day, and I like it. My skin looked natural but still with a decent amount of coverage.

Conclusion

So finally, here are my thoughts about the three products I picked up from this line, which are the tinted moisturizer, the concealer, and the primer.

The tinted moisturizer: It has a very light consistency, but I don’t find it runny. One pump is enough to cover my entire face. It has light coverage and to be honest I don’t find the need to build it up. If I need more coverage, I’d better go with a BB cream or a foundation. It can be applied easily with our fingers, and then just dab it with a blending sponge just to make sure it’s spread evenly onto our face. I think I won’t ever apply it with only a sponge since it has light consistency, the sponge might absorb it too much, and it’s such a waste of product. It stays on quite well on my face even without primer. When I set it only with pressed powder, after 6 hours I get some sheen to my face. When I set it by using baking method, I get visible sheen only after 8 hours and it doesn’t really transfer or wiped off. Even when I wear it with the concealer or not, my under-eye are is not creasing after 8 hours. It also worn of nicely (not patchy). I really recommend this product for when you want a very casual makeup day or if you like light coverage base. If you like full coverage base, I think this product is useless for you.

The creamy concealer: It really does what it claims. It’s creamy, cushion-y, full coverage, and a little goes a long way. It feels light-weight, too. If you like full coverage makeup, then this is for you! It’s better to apply it with a sponge. I don’t know about brush, tho, because I never apply my concealer with a brush. If I bake it well, it stays on very well and I personally don’t get any creasing even after 12 hours. If I don’t set it properly, it moves around my face, creasing, and worn off a bit patchy. So I highly recommend you to set it properly! I’m so used to matte concealer, so I’m happy I found this concealer that’s creamy but not greasy and stays very well on my skin. Definitely a nice addition to my collection, and I think I might repurchase it!

The setting mist: TBH, I don’t find any setting property with this setting mist. I don’t find my makeup stays on better even after using it. It has nice coconut scent that’s not too overpowering, but if you don’t like makeup with scent, you might want to re-consider picking it up. However, it’s a nice pick-me-up that you can spray to your face in the middle of your day. It also brings back the natural finish to my face after applying a face of makeup. What I like the most about this setting spray is actually the nozzle. It sprays the product finely and spreads it evenly onto my face. However, frankly speaking, you won’t be missing out even if you don’t have this in your collection. I personally didn’t regret picking it up, but I might not repurchase it since I like my Milani setting spray far better.

So yeah, that’s all my review, guys! I hope you found it helpful. Please tell me on comments below which one/ ones you picked up and how you’re liking them so far? Or if you haven’t, which ones will you pick up?

Talk to you, soon!

Colourpop So Jaded Palette Dupe

Hey, all!

After what feels like a blue moon, I finally can play with makeup again! For a couple of months back, life was a bit crazy so I didn’t have other choices than to prioritized it first >.< But recently, as things are getting under control, I thought I want to sit back and relax and finally dust-off my makeup collection XD

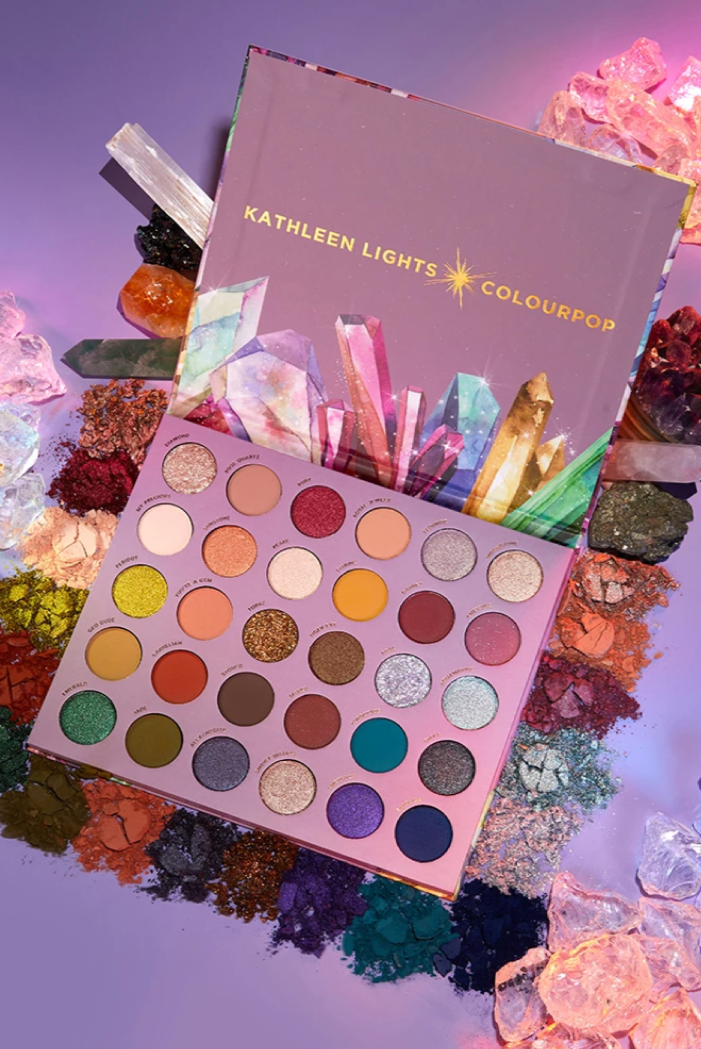
Around the beginning of September, Colourpop, THE brand that never sleeps, released yet another collab with Kathleen Lights, one of a few big YouTubers I still watch for the past 5 years. And this collection is kind of special because, for the first time, CP released a MEGA eyeshadow palette that consists of 30 shades in a palette. This palette is called So Jaded, and retails for $ 39.

courtesy of Colourpop

With BIG ideas, come even BIGGER palettes. In collaboration with Kathleen Lights, introducing our biggest palette ever. 30 super pigmented shades, including the perfect combination of matte and metallic shadows, 1 Super Shock Shadow, and 2 Pressed Glitters. Inspired by crystals and gemstones, create a rich neutral eye or the perfect jewel toned monochromatic look – this palette is everything.

Colourpop website

Kathleen has always been creating a pretty and unique collection, so I can’t complain even if they collaborate again and again. And this one too is no exception. The color choices are pretty and vibrant, and they happen to be the colors I gravitate toward when it comes to an eye look.

At first, I was sure I’m going to pick up this palette whenever it’s on sale (I know, I’m cheap XD ). But the more I saw swatches and reviews, the more I came into the realization that I might have most of the shades in that palette scattered on all of my eye shadow palette collection. So, I decided to take a closer look at my collection and find as many similar shades as possible.

Surprisingly, it didn’t take too long to gather all of those similar shades! I found these dupes from 9 palettes from my collection. I will make an abbreviation of the name of each palette to make it easier for me to mention them. They are Colourpop’s “Chasing Rainbows” (CR), “Through My Eyes” (TME), “It’s A Princess Thing” (IAPT), “Good Sport” (GS), “Give It to Me Straight” (GITMS), “Sweet Talk” (ST), “Main Squeeze” (MS), “It’s My Pleasure” (IMP), and Urban Decay’s “Born to Run” (BTR).

On Colourpop website, they didn’t do the swatches based on each row of the palette. Instead, they did it based on the color family. I will collage the swatches I took with the swatches on Colourpop website. The top picture will be my swatches, and the bottom picture will be Colourpop’s swatches.

Without further ado, here they are!!

The first color family is the neutral one. I will break it down one by one from the right most shade. I didn’t find any dupe for shade “Pearl” and “Rose Quartz” from this family. For the shade “My Precious”, I found two dupes, which are “Matter of Fact” from GITMS and “Chip” from IAPT. They’re just a nude shade that are perfect for setting my eye primer. The next shade is “Royal Jewels”, and my dupe is “Grumpy” from IAPT. This one is a nude-pink shade. The shade “Grumpy” looks a bit too pink on this picture, but in real life, I think they’re pretty similar. And the last shade is “Diamond”, which is a super shock shadow, my dupe will be the shade “Side2side” from ST which is also a super shock one.

The next color family is the red one. I didn’t find any dupe for “Jasper”. The shade “Garnet” will be duped by the shade “Red Bottom” from MS, the shade “Ruby” will be duped by the shade “Nocturne” from TME, the shade “Carnelian” will be duped by the shade “Hooky” from GS, the shade “You’re A Gem” will be duped by the shade “Truth Hurts” from GITMS, and the shade “Sunstone” will be duped by the shade “Melody” from ST. “Truth Hurts” looks a little bit too pink on this picture, but in real life, actually it’s coral enough, similar to “You’re A Gem”.

The next color family is the blue-emerald one. I only found three dupes for this group. The first one was “Onyx”. It is similar to the shade “Midnight” from IAPT. This is a black matte with a bunch of sparkly particle. The second one was “Emerald”, which I found the dupe from an Urban Decay palette, BTR, in the shade “Wanderlust”. And the last one was the shade “Turqoise”. It’s similar to the shade “Bring It” from CR.

The next color family is the purple one. I didn’t find any dupe for shade “Alexandrite” and “Flourite” from this family. For the shade “Stoned”, I found the dupe from GS in the shade “Trophies”. The next shade is “Amethyst”, and my dupe is “Chick Lit” from IMP. This one is a pretty spot-on dupe. The shade “Ametrine” looks pretty much the same as the shade “Pretty Cruel” from IMP. And the last shade “Smoky Quartz”, also looks pretty much the same with the shade “Eclipse” from CR. This shade is very unique, it looks like a grey-ish taupe-y purple, very pretty on the eyes!

And finally, we came to the very last color family, the green one! I found three dupes for this group. The first one is the shade “Citrine” will be duped by the shade “Wild Sould” from TME. The next shade, which is a pressed glitter one, “Topaz” will be duped by also a pressed glitter, which is the shade “Early Mornin'” from ST. And the last shade is the shade “Peridot”, has a pretty spot on dupe, which is the shade “EBB” from GS.

So that’s all guys the dupes I found from my collection (pat myself). I found 18 similar shades from 30 shades in So Jaded. Which means, if I buy it for $ 39, I only get 12 new shades!

By finding these, I’m not trying to say that Kathleen copied everything that has been released by Colourpop and put it into one palette. No, that’s never my intention. At beginning of this year, I promised myself to be wiser with my spending. Therefore, before buying anything, I always try to investigate, whether I have a similar stuff like that in my collection, whether I really need that stuff and whether that stuff will add value to my collection. And I always avoid buying something impulsively just because the hype surrounding it.

This year I managed to wait a couple of months before buying anything. By doing so, I can really see whether I still want it even after waiting for some time. And by doing so, I can manage my spending better.

After finding these dupes, do I still want So Jaded palette? Kind of, because I still think it’s nice to have all the colors I like in one palette without having to grab from several palettes all at once. But again, do I ever grab shadows from several palettes when I do my eye makeup? No, I always try to use only one palette every time I do my eye makeup. Do I want to spend $ 39 for 12 new shades? Absolutely not. If they’re discounted even for 40% will I grab it? Hmm, kind of >.<

So, did I decide to never pick this palette up? No, unless they release another big palette with color story I like more. At this time when I’m writing this post, actually they’re going to release another 30-pan palette called Bare Necessities. But since the shades are pretty much neutral, I decided to not pick that one up.

What do you think, guys? If you were me, will you still pick this palette up? Will you pick it up when it’s discounted? Please share your thoughts on the comment section below, k?

I also have a referral link so that you can get 20% off your FIRST purchase only. This is not an affiliate code but I will get also 20% off my next purchase if you use this link to make your FIRST EVER purchase with CP. So it’s a win win for us!

My Referral Link

This code (as far as I’m aware) is applied for all Colourpop’s products including new arrivals. So it’s a very good deal! Please feel free to use it or not. I really appreciate if you decided to use my referral link to make your purchase! ^^

Talk to you soon!

Colourpop BYOP Haul and Review: May 2019

Hey, all!

Today’s post is an exciting one because I finally order my first ever Colourpop BYOP palette! Yeay!!

I always wanted a face palette because I travel quite often and bringing my face makeup all in one palette can save so much time in packing and so much space in my travel makeup bag. There are so many face palette in the market of course, but the idea of being able to design my own palette or put together all the shades that really suit my skin tone or my preference is really appealing to me. And that’s why I’ve been eyeing this BYOP palette for a long time.

PS: stay tuned until the end to get a 20% off discount code to shop on Colourpop website (NOT A CLICK BAIT)

What is BYOP?

First of all, I want to give general information about what BYOP is. So, if you don’t know what it is, or if you know about it already but want to know more why it’s so recommended to buy it, I’ll give you general information about it here! But, if you know all the detail about it already, you can just skip to the next section, which are my swatches, haul, and review section!

BYOP stands for ‘Build Your Own Palette’. Just like its name, you can make your own palette that consists of several selections of products that you can choose by yourself, and an empty magnetic palette to store the products you’ve chosen. The products could be pressed shadow singles, pressed cheek powder singles (including setting powders, bronzers, highlighters, and blushes), or combination of them. Here are some arrangements CP offers on their website.

BYOP selections

Here are the normal price of every BYOP products individually:
Single shadows: USD 4
Setting powder: USD 8 (pan only) and USD 9 (with compact)
Bronzer, blush, highlighter: USD 7 (pan only)
Magnetic empty palette: USD 10

Technically, BYOP is always available on CP website, but not the BYOP SALE. The BYOP itself without the SALE has already reduce the price of all the products together. As you can see from the picture above, the total price of 6 cheek products plus 1 empty palette should be 6 x 7 + 10 = USD 52, but if you buy them from BYOP section on CP website, the price became USD 38. BUT! During the BYOP SALE, the price is even cheaper. That USD 38 becomes USD 30 (see picture below). That’s why if you really want the BYOP, you better snatch it during the BYOP SALE.

BYOP during SALE

Haul

As I mentioned before, I always wanted a face palette, and CP BYOP has been in my wish list for a long time, but I couldn’t pick it up because of my low-buy rules. And actually, according to my rules that I made myself, I can only buy new products on June. But, when CP finally had the BYOP SALE on May, and especially with the empty palette design that I really want (the pink desert palette, see picture above), and at the same time they also had a 20% off their Disney collection products PLUS 40% off their super shock products, I decided to finally break my 4 months of no-buy and place my order of BYOP and some other things that were on sale at that time.

The pink desert palette that I really want

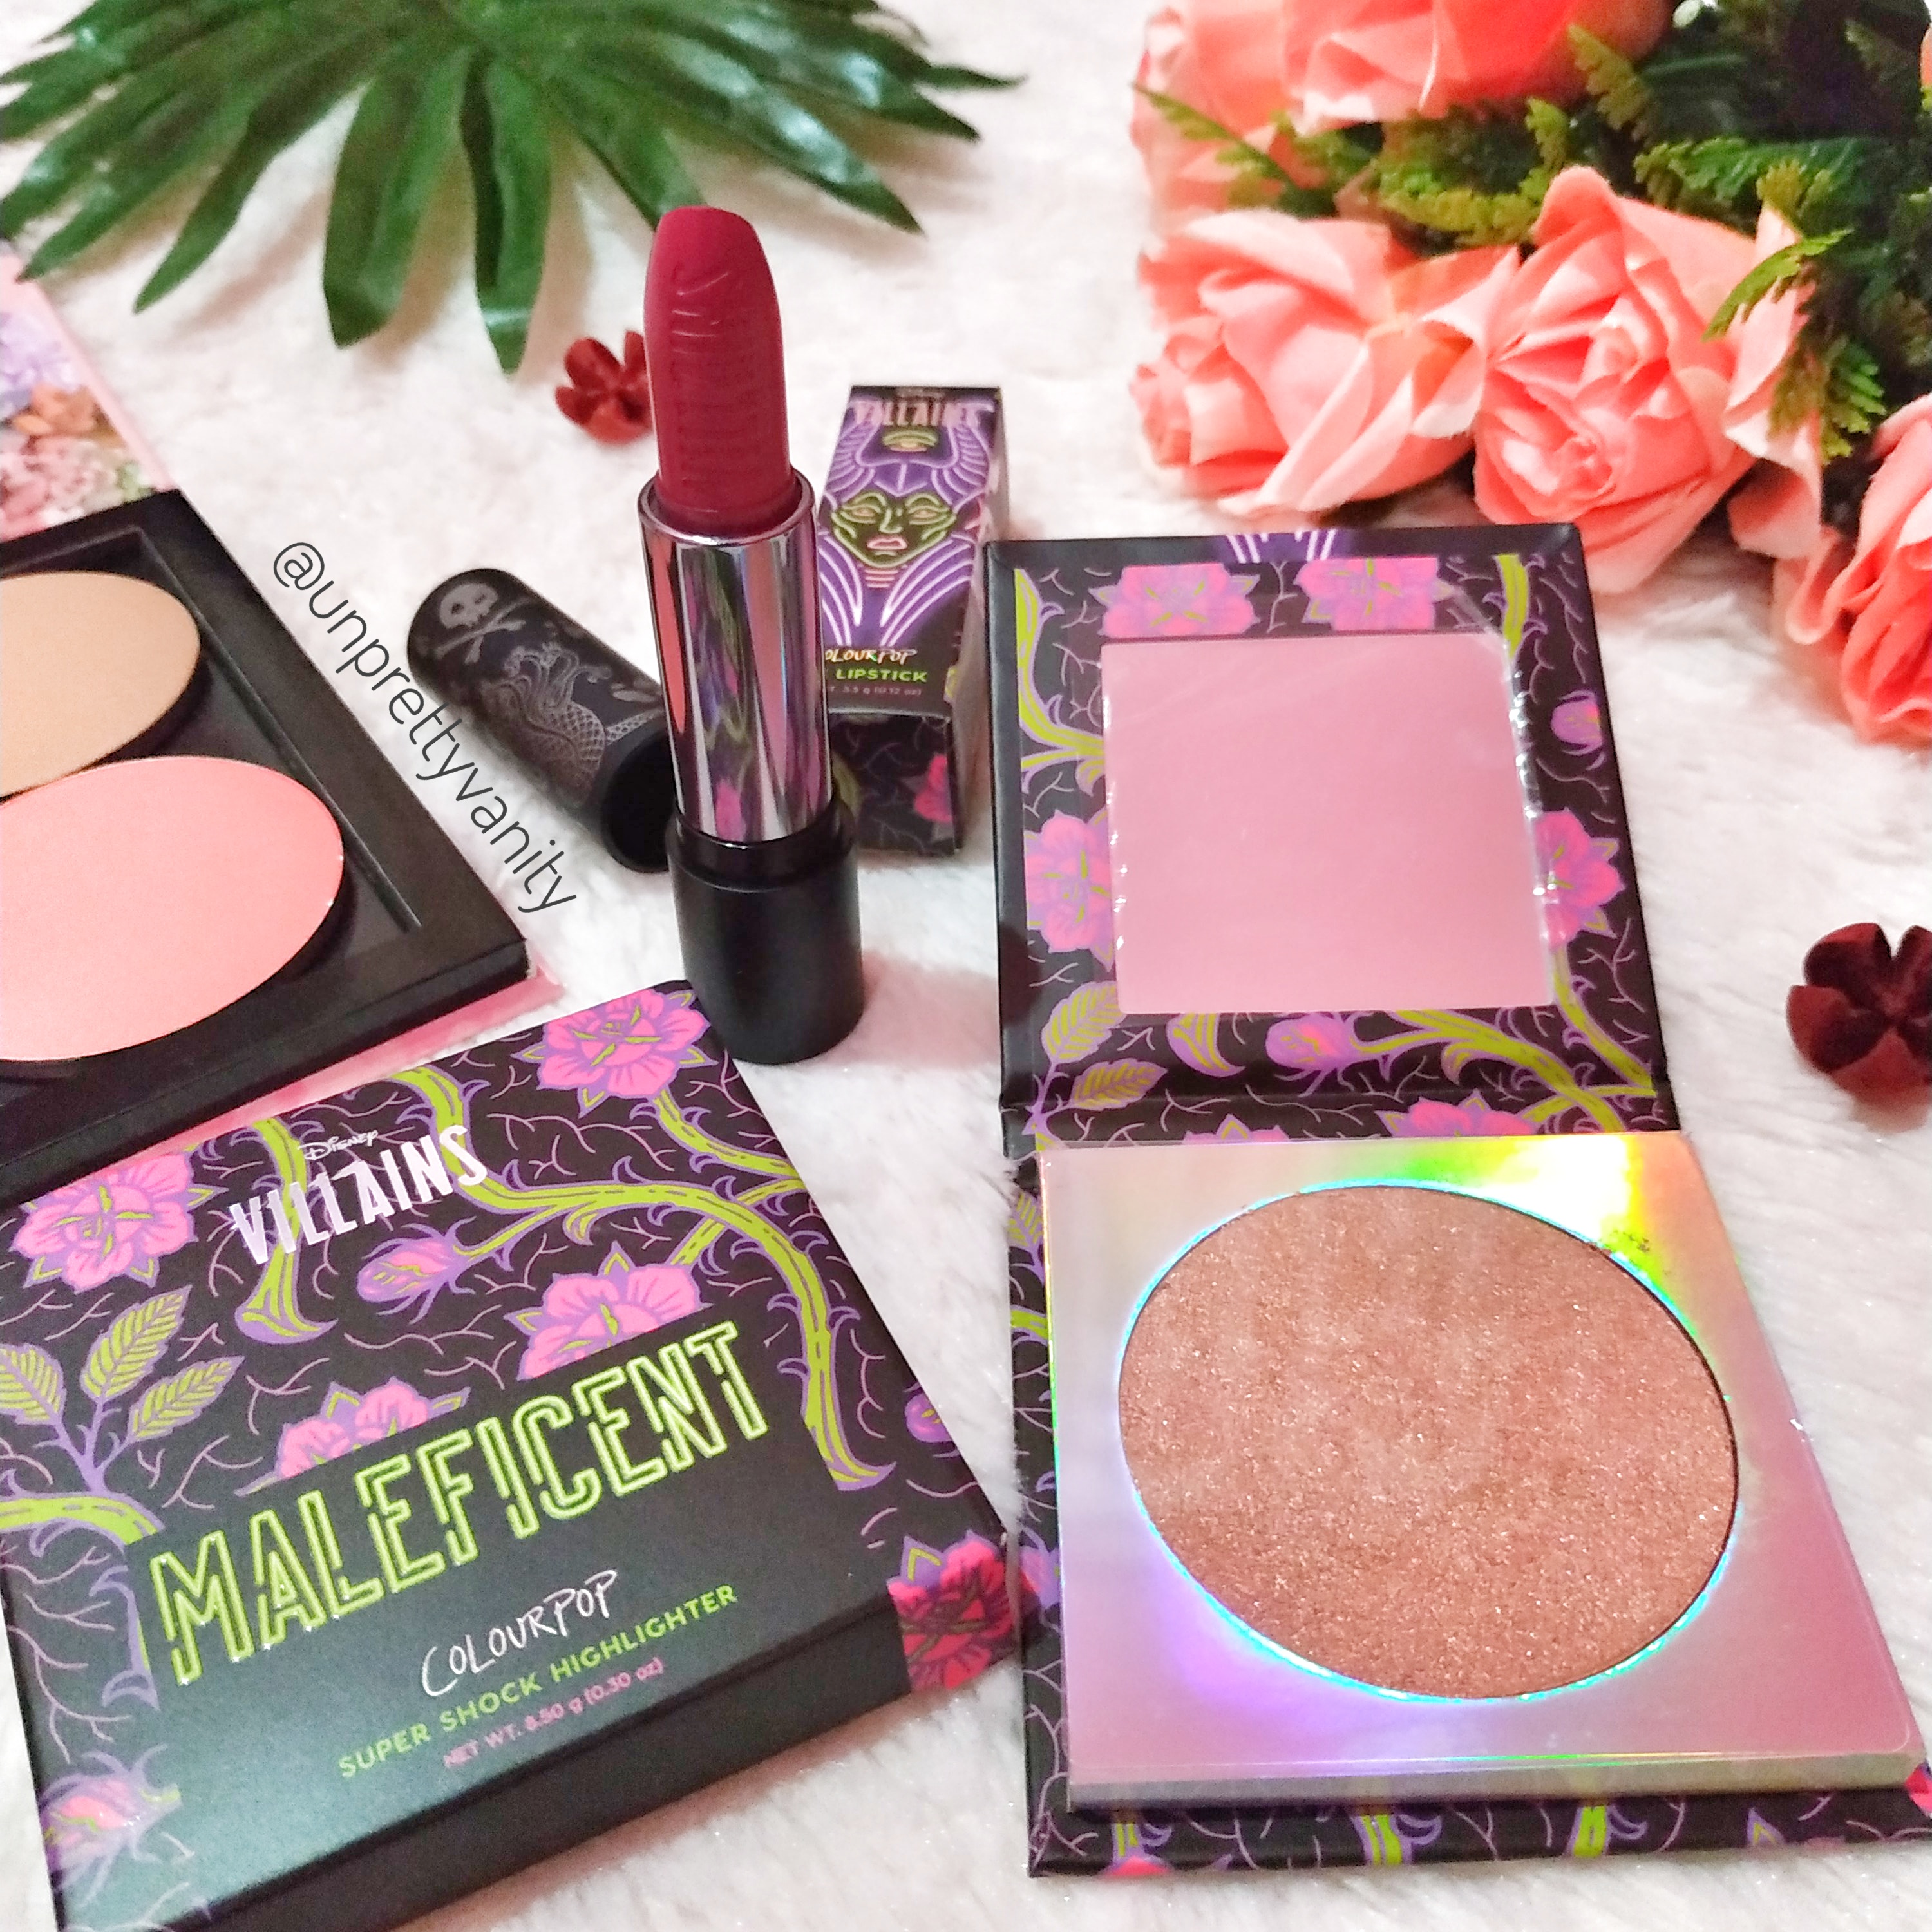
The first things I picked up were from Colourpop x Disney Villains collection, which were the ‘Maleficent’ creme lux lipstick and Maleficent highlighter (called ‘Mistress of All Evil’). Not that I’m a big fan of Maleficent, it’s just because I like CP creme lux lipstick, and from all creme lux lipstick in this collection, only this color I don’t have in my collection. And I picked up this highlighter just because I like the shade the most among other highlighter in this collection.

Maleficent lipstick and highlight

The next things I picked up were from 40% off super shock products, I picked up two 2019 Spring collection blushes, which were ‘Growth Flirt’ and ‘Get Leid’, and one super shock shadow, which was ‘Sequin’. The super shock shadow came broken, but fortunately since it’s in super shock formula, I can re-press it without problem.

Broken ‘Sequin’ super shock shadow
Swatch of ‘Sequin’. Left: sheer swatch. Right: packed swatch.

The next two things I picked were not on sale, they were ‘Ur Thriving’ creme lux lipstick from Spring 2019 collection and ‘Mesmerize’ blur lux lipstick.

‘Ur Thriving’ lipstick, ‘Growth Flirt’ blush (left), ‘Get Leid’ blush (right)
Swatch of ‘Mesmerize’. This color is such a neutral muted pink. Really love it!

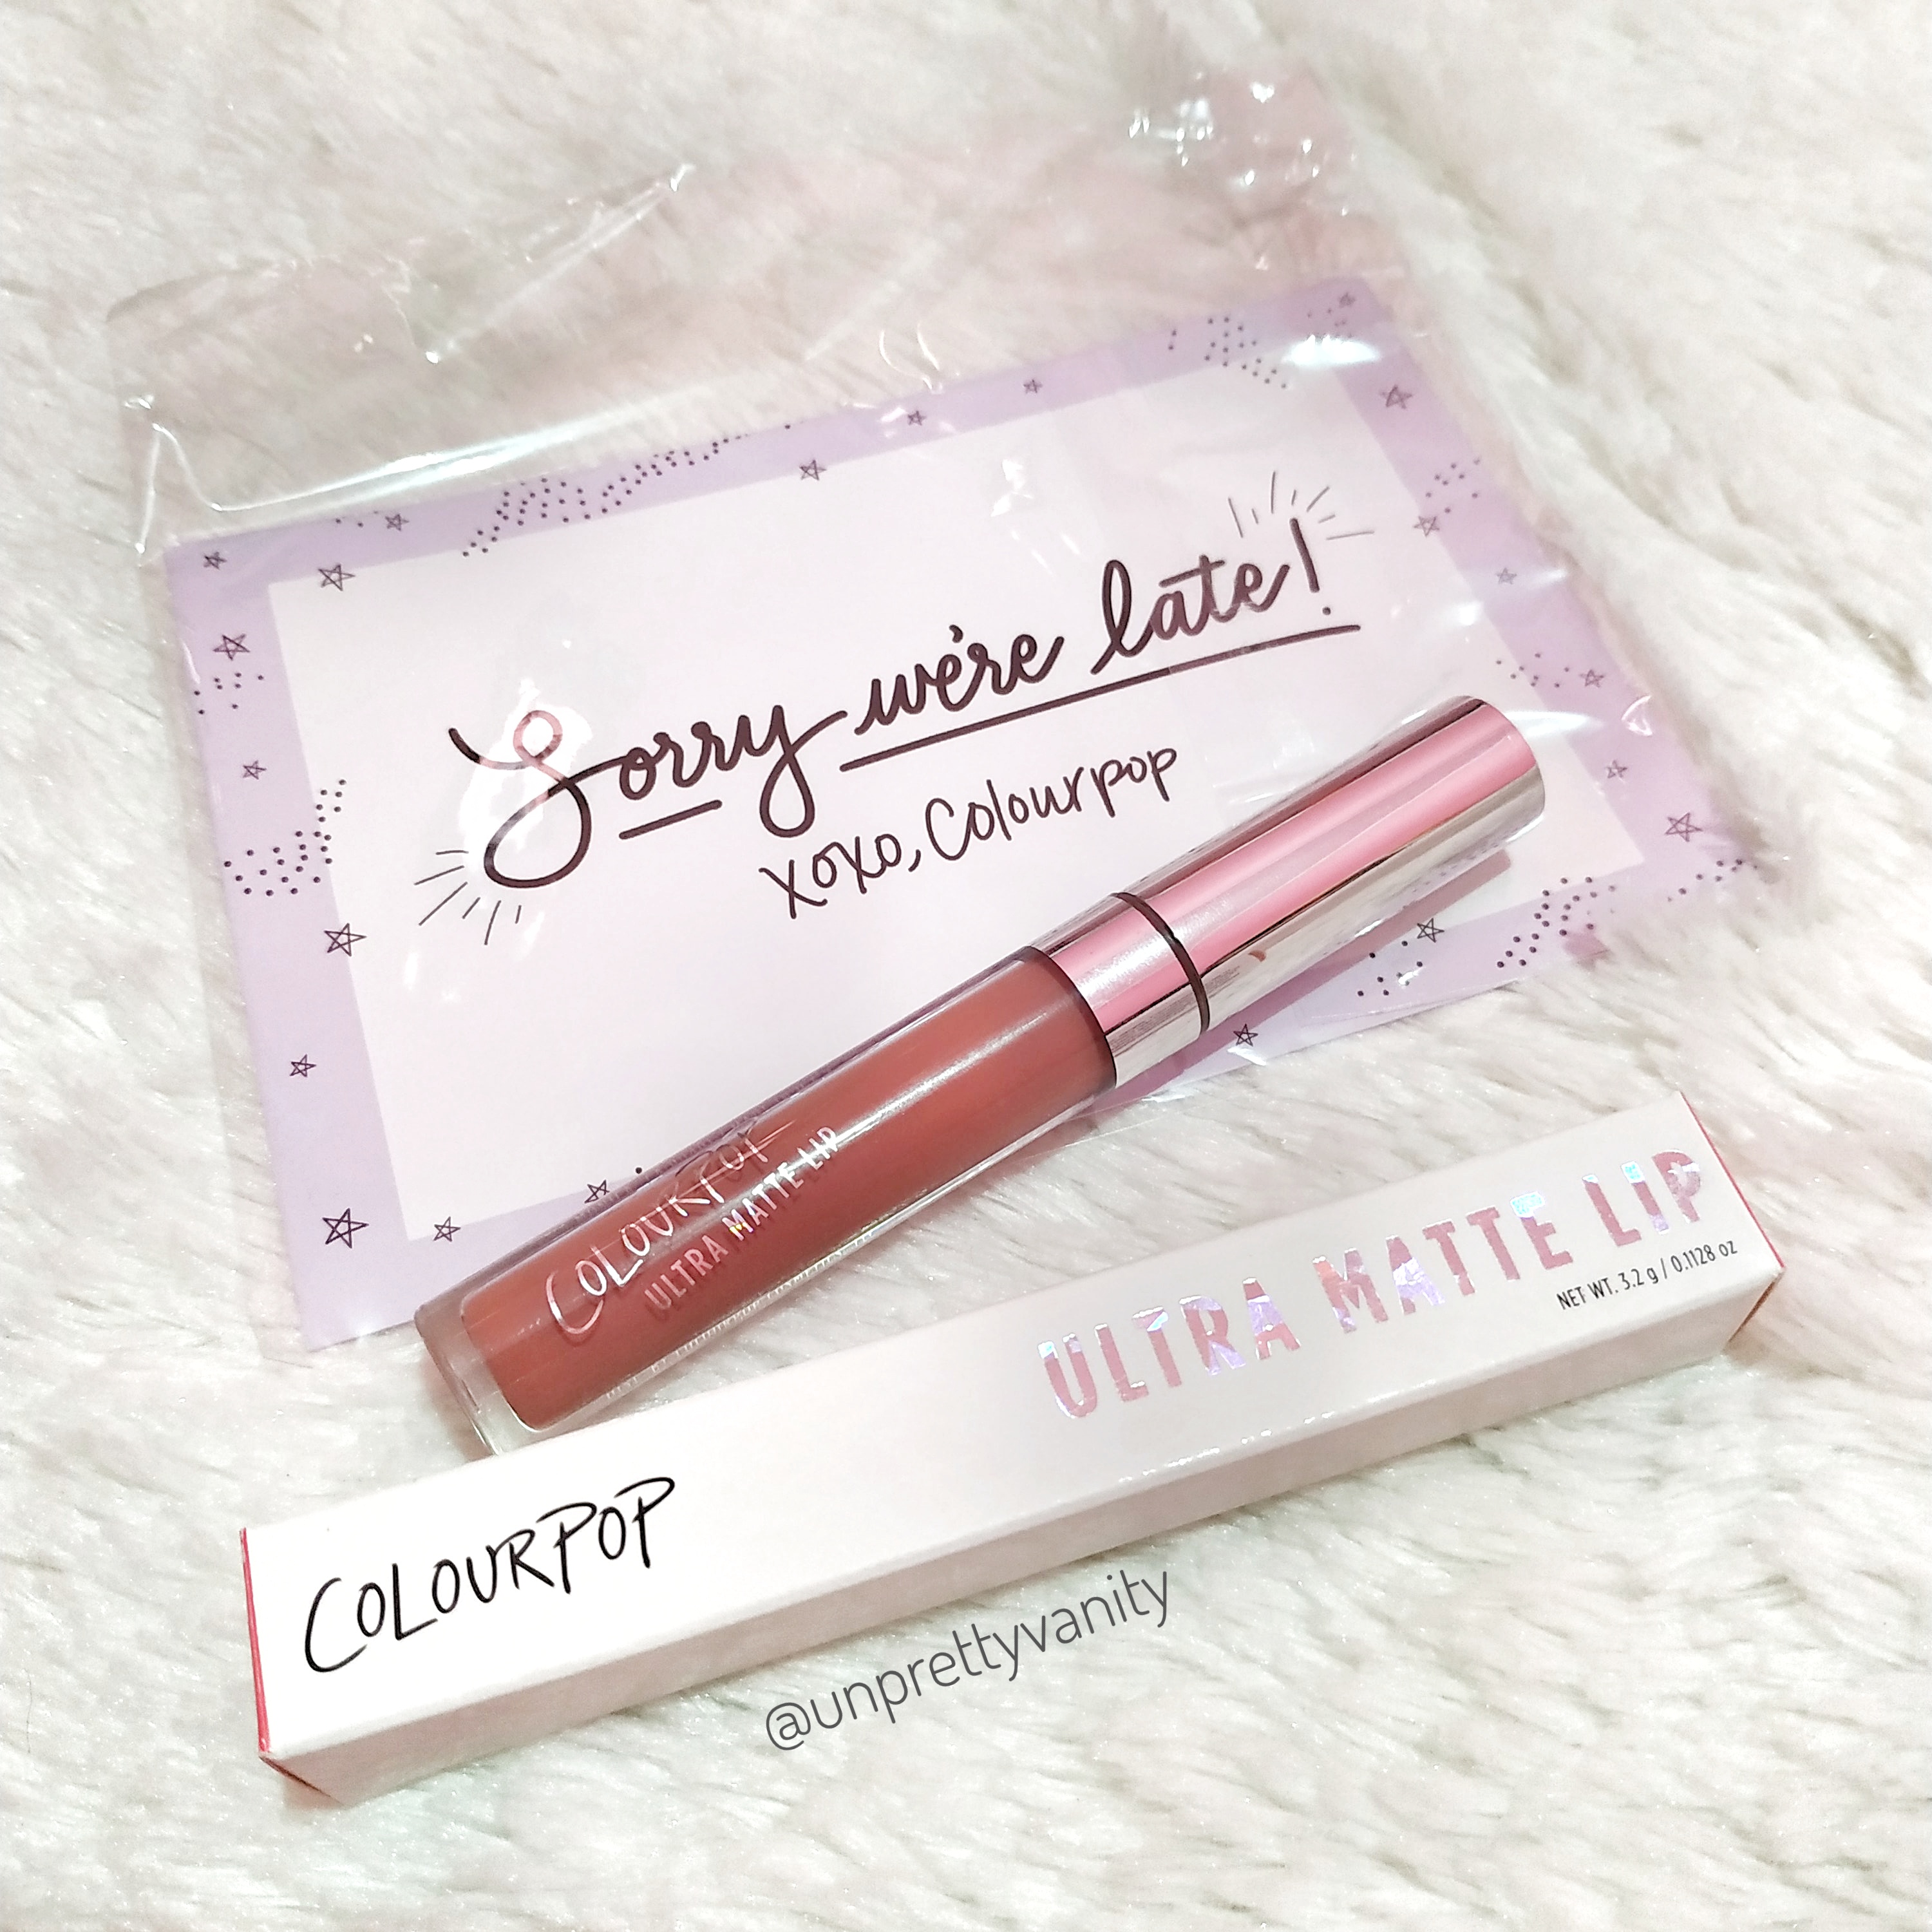
I also got an ultra matte lip in the shade ‘Monday’ because they sent my order a little bit late.

Ultra Matte Lip in ‘Monday’ as freebie.
Swatch of ‘Monday’. The color is pretty neutral, but the formula is too dry for my liking.

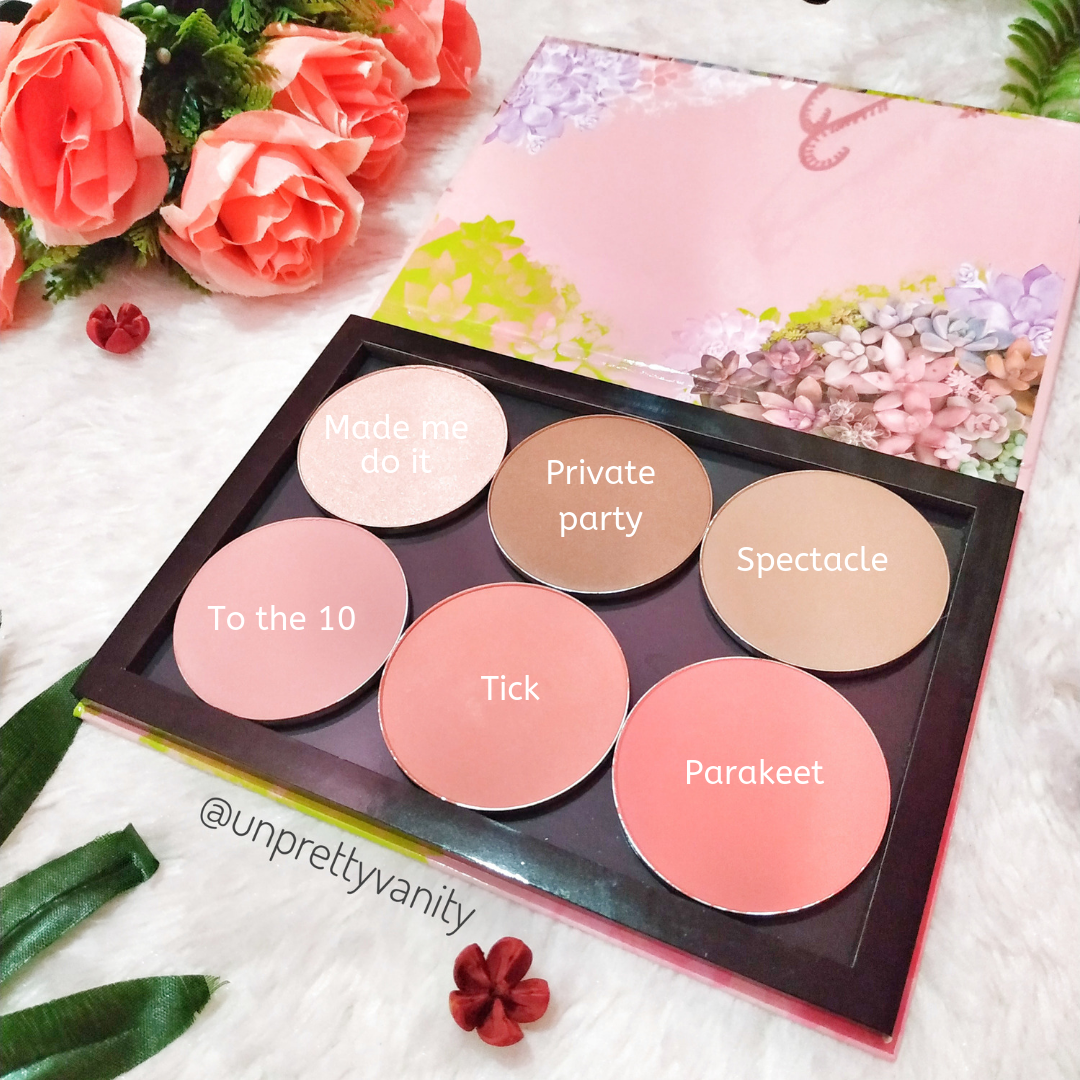
And finally, for the BYOP itself, I picked up the 6 cheeks palette that consists of 1 highlighter in the shade ‘Made Me Do It’, 2 bronzers in the shades ‘Private Party’ and ‘Spectacle’, and 3 blushes in the shades ‘To The 10’, ‘Tick’, and ‘Parakeet’.

My BYOP 6 cheeks palette!

BYOP Swatches and Review

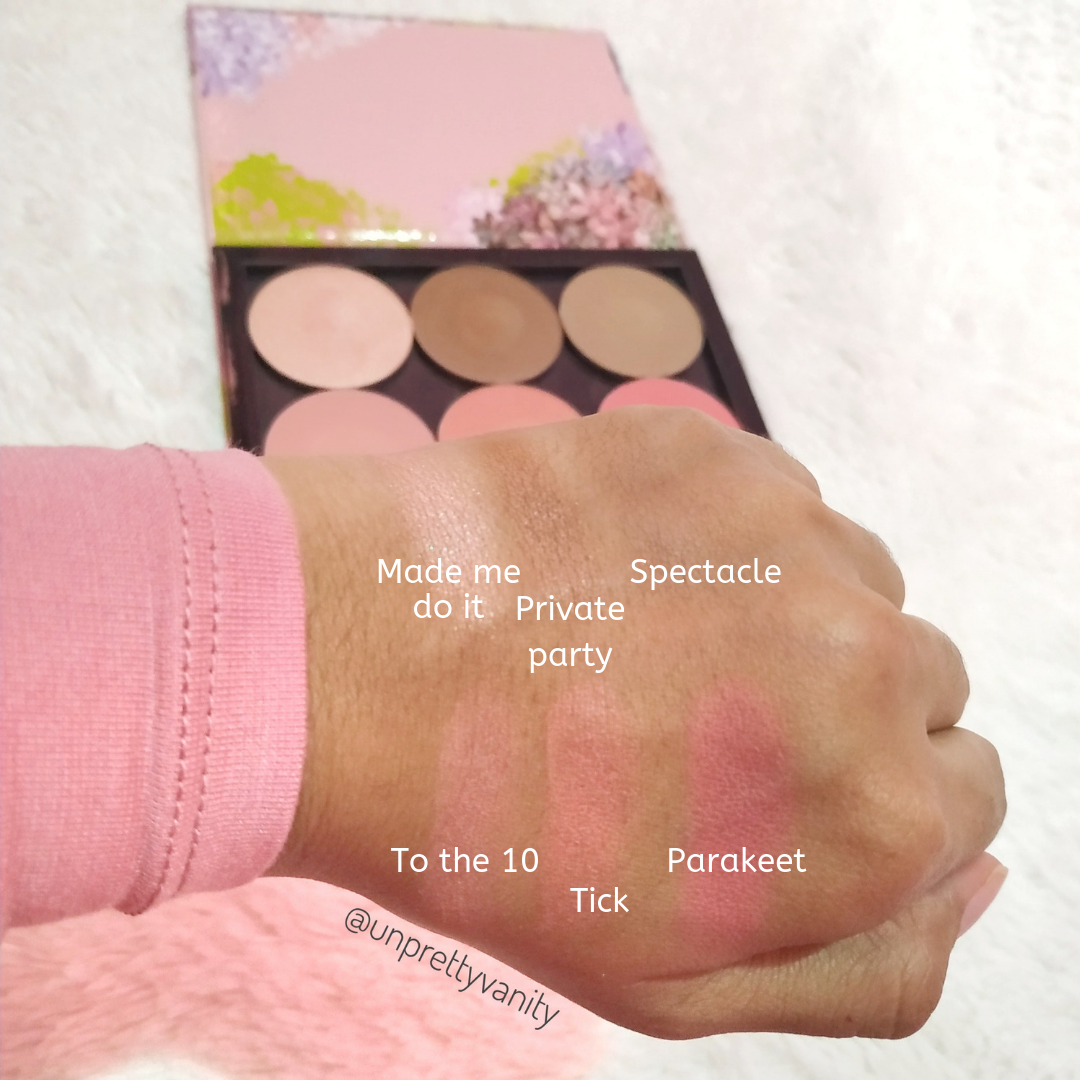
Here are the swatches of my BYOP:

Swatch of my BYOP palette

‘Made Me Do It’ is a champagne pink highlighter. When swatched on hand, the pink is visible, but when applied on the face using a brush, actually the pink is very subtle and the champagne is more dominant. I like that the highlight is not glittery at all. It just gives a very natural sheen. And for me who usually go for a matte finish for my makeup look, I feel like my skin looks more dewy (but not greasy) when wearing this highlighter.

‘Private Party’ is a satin bronzer which I never even think of trying before. But, when I heard Kathleen Lights raves so much about it, I thought I want to give it a try. And I’m not disappointed AT ALL! It’s so pretty and gives natural-looking sculpt to my face. I can’t stop wearing it every time I do my makeup. I can even wear it alone without blushes. But be careful when applying it because it’s so pigmented. A little really goes a long way.

‘Spectacle’ is a light brown bronzer. So as I use ‘Private Party’ as a bronzer, I think I need one cool-toned bronzer as a contour in my palette because I do contour my nose and my cheeks. This bronzer is a little bit light for my liking and my skin tone but it still works fine. And for your reference, I use Colourpop No Filter Stix foundation in 81N and concealer in Medium 26. So if you have deeper skin tone than me, I think it won’t show up on your skin.

‘To The 10’ is a neutral warm pink blush. I love neutral tone pink so picked this one up. It’s the most natural blush shade in this palette and it has matte finish. This will be my go-to when I just want a slight flush on my cheeks.

‘Tick’ is a soft orange blush and it has satin finish. I picked this to give a different shade and finish on my palette.

‘Parakeet’ is a bright warm pink blush with matte finish. It’s so pigmented so you have to go light hand when applying it. The other two blushes I picked up here are not as pigmented as this one, so the first time I tried this on my cheek, I almost ended up with a red face. Fortunately it blended out nicely so I could still save my look that day!

20% Discount Code

This is what I promised you guys. I have a referral link so that you can get 20% off your FIRST purchase only. This is not an affiliate code but I will get also 20% off my next purchase if you use this link to make your FIRST EVER purchase with CP. So it’s a win win for us!

https://www.talkable.com/x/boSyX0

This code (as far as I’m aware) is applied for all Colourpop’s products including new arrivals. So it’s a very good deal! Please feel free to use it or not. I really appreciate if you decided to use my referral link to make your purchase! ^^

Final Thoughts

That’s all my review about my BYOP palette. I had fun choosing the shades and I’m glad that I have everything I want in one palette. From a highlighter, satin warm bronzer, matte cool contour, matte natural pink blush, satin more orangey blush, and finally a matte bright pink blush. I was actually considering to pick up a setting powder, but I still have so many powder I want to finish, so I decided not to pick it up (for now).

What do you guys think about my haul? Will you be getting your own BYOP? What shades really call your name? Please tell me on the comments below!

I’ll see you next time!

Best Japanese Drugstore Beauty Products

Hey, all!

As I mentioned several times in this blog, although now I live in Indonesia, I once lived in Japan for 3 years from 2013-2016. During that time, I, of course, used Japanese drugstore beauty products a lot. And by doing so, I found several gems that I keep re-purchasing even though now I’ve returned to my country.

So I thought today I want to share with you my own Japanese drugstore beauty products recommendations in case you are traveling to Japan but not sure what to get. Or maybe you are just moved to Japan and not sure where to start since Japanese drugstores are quite huge and potentially overwhelming since everything is written in Japanese!

So if you are interested in, just keep on reading!

Skin Care

Biore UV Aqua Rich Watery Essence

I can safely say that this is the best drugstore sunscreen I’ve ever tried in my whole life (and believe me when I say it, I tried quite a lot!). It’s super affordable, non-greasy, and quickly melt into the skin the second it’s applied. It does have fresh scent but not too overpowering. And I even feel like it adds adherence to my skin so that my makeup sticks better onto my skin when I’m using this sunscreen.

I don’t have any plan to try a new sunscreen anytime soon since I haven’t heard anything that’s close match to this one. If you could get your hands on this, I highly recommend you to try it out. And since Biore is a quite globally known brand, I’m pretty sure you can get this not only in Japan but maybe also in your country, too (it’s sold in select Indonesian drugstores, by the way).

Cure Natural Aqua Gel

Natural Aqua Gel Cure is a remarkable skin care product. Cure is a fragrance-free, color free and preservative free product made from activated hydrogen water that prevents oxidation. General chemical peeling uses strong acids (approx. pH1.3) to dissolve protein. Cure, on the other hand, gently catches dead skin cells on the surface of the skin and removes it.

citated from https://cureaquagel.com/

This one is I think maybe one of the most unique products Japanese drugstore has. It’s not a cleanser, not a facial wash, not a scrub, it’s an exfoliator in a form of gel. The texture it’s like gel but more liquid-y or watery, not as thick as man’s hair gel, for example. I’ve also mentioned it briefly on my post about my skin care routine.

It’s meant to be used only twice a week because it’s an exfoliator. I use it after I double-cleanse my skin or basically after I make sure there’s no makeup left on my face. To use it, you just have to take 1 pump of it on your palm, and then massage it all over your face like when you use your scrub. While doing that, just like its claim, you will find it catches your dead skin cells and removes it. I feel my skin is very soft and clear after using it.

Kanebo Suisai Beauty Clear Powder

suisai Beauty Clear Powder face wash is catching the eye of the worldwide audience with an enzyme-activated formula that whisks away impurities and unclogs pores as it protects the skin’s natural moisture. A popular choice for tourists who desire the Japanese secret to even, finely textured skin.

citated from https://www.kanebo.com/brands/suisai/

If you can’t already guess what this is, this is a facial wash in the form of powder. One small jar contains the powder is for one single usage. To use it, you just mix it with water. Adjust the amount of water according to how scrubby you want it to be. The more water you add, the less scrubby it is, and vice versa.

After using it, my skin feels so clean as if all the dirt has been taken off without making my face feels tight. It’s not very expensive, but here in Indonesia, it’s not sold in drugstores, but only in online shop run by personal shoppers so the price becomes quite expensive. So I can only buy it by asking my friends who are still living in Japan to help me buy it when they will have a short vacation to Indonesia. Since it happens only maybe once or twice a year, I use this fairly rarely.

If you can find it with reasonable price, I highly recommend you to incorporate this in your daily skin care routine!

Purequa Face Wipes

Actually, Japanese drugstores offer wide variety of face wipes, but I really love this particular one. It’s really soft on the skin so you won’t feel you rub your skin too hard. It’s really effective in removing our makeup as the first step of our skin care routine. According to my experience, it can also removes my waterproof eyeliner and mascara!

Makeup

Mote Liner

This one is really hyped up by many Asian beauty bloggers/ vloggers and after trying it, I agree with the hype. The tip is not a felt tip but it’s a very fine little brush that can bend. I personally like this type of tip because it makes applying liners so much easier. I’m in no way expert in applying liner, so I think this one is also very beginner-friendly!

Please note that the one that I have here is actually a limited-edition navy blue. They have other options too such as brown (also limited-edition) and of course black (permanent line)! Even though this one is navy blue, if you look it not too close up on my face, it doesn’t really look like I’m wearing a blue eye liner because it’s pretty dark. I enjoy wearing it so much lately!

Canmake Cream Cheeks

First of all, I found that many Japanese drugstore makeup products are too sheer for my skin tone or even my liking. Be it blushes, contours/ bronzers, lip products, etc. That’s because the nature of Japanese daily makeup style itself is usually a no-makeup makeup look. BUT! These particular blushes are exception! They are available in many different shades and formula so you will have some options there. Besides that, Canmake as a brand in general has other interesting products and it’s one of the most affordable in Japanese drugstore! I highly recommend you to check their other products also!

Miscellaneous

Megrythm Steam Eye Mask

I never knew this was a thing before I found it in Japanese drugstore. It’s an eye mask that releases steam that’s supposed to help us relaxing our eyes after a tiring busy day. Try to wear it before bed after a nice warm shower or bath!

‘Ashirira Sheet’ Detox Foot Patch

‘Ashirira’ is an acronym of ‘ashi’ which means ‘foot’ in Japanese and ‘rira’ which was taken from English word ‘relax’ that is read as ‘rirakusu’ in Japanese. This product is a pair of patches or sheets that you stick onto your soles before you go to bed and leave it until you wake up. The next day when you take it off, it’s supposed to absorb all toxic from your body. There are actually some debates surrounding this product. Some says it’s gimmicky and not doing what it claims. Some says it works. I think if we want to proof whether it works or not, we have to scientifically test it in a lab. I personally like wearing it but don’t feel significant changes just by using it daily (which I don’t). But I still think it’s nice to have and recommend you to try it out!

Honorable Mention

Shiseido Senka Perfect Whip

image courtesy: sociolla.com

I actually don’t have this with me right now but I used to use it when I lived in Japan. It’s a very light-weight and gentle facial wash. It cleans but doesn’t feel tight on the skin. It’s available here in Indonesia but I didn’t repurchase it because I’m currently enjoying my Cetaphil facial wash. If you live in Japan and need one that I recommend, it’s this one! It’s one of the most affordable also!

Lululun Sheet Masks

I think I only used it once but I remember liking it, and I know many peple are hyping this sheet masks so much. They have several options such as: hydrating, brightening, and balancing. I also didn’t repurchase it by now because to be honest, I like my Etude House sheet masks more because I feel the Etude House ones fit my face’s size better!

image courtesy: allabout-japan.com

That’s all my Japanese drugstore beauty products recommendation! I hope it helps you in sorting out your list to buy while you’re in Japan. Ah..writing this brings back all good memories and makes me miss Japan even more! I wish I could go back someday even just for several days!

What are products that most intriguing to you? Do you find your wish list here? And do you like if I write more about Japan’s related recommendation? Like for example unusual traveling spots recommendation? Or supermarket recommendation? Please tell me on comment section below!

See you on my next post!

Colourpop 2019 Birthday Collection: Buy or Bye

image courtesy: colourpop

Hey, all!

Today’s post is another episode of my Buy or Bye series where I talk about recently-released full makeup collection and discuss whether it’s worth a purchase or not. At first I didn’t plan to make this a series in my blog, but from time to time, I find some full collections worth to discuss! I wrote one before, which was the Zoella x Colourpop collection. As they are still available now on Colourpop (CP) website, do check that link if you want to know more about my thoughts on that collection.

This month, May, Colourpop, the so-called brand that never sleeps, is celebrating their 5th birthday. CP has been releasing a bunch of new stuffs and drops many sales every other week, so of course this month is no different, especially since it’s their birthday month. According to their tradition, they always released a full huge collection as well as one special super shock shadow that is limited edition and comes as freebie for every purchase.

By the time I wrote this post, I actually have placed my order, so I’ll tell you what I got!

Ok, without further ado, let’s dive right into the post!

PS: stay tuned until the end to get a 20% off discount code to shop on Colourpop website (NOT A CLICK BAIT)

Full collection

Since this is their Birthday Collection, of course everything must be so special. Not only it’s a HUGE collection, the main theme of this collection is also not disappointing (at least for me!). The theme of this collection is watermelon. Every items here are designed and named accordingly. The graphic design of the packaging is so cute, and you know I’m a sucker for a cute packaging. If I had unlimited amount money, I’d probably have bought everything just because of the packaging! ><

image courtesy: colourpop

The full collection consists of following items:

Main Squeeze eye shadow palette: USD 12
Best Served Chilled bundle: USD 24
Three liquid lipstick duos: USD 12 each
Melonade ultra matte lip: USD 7
Big Slice so juicy plumping gloss: USD 7
Three Supernova shadow and Mini Gliterally Obsessed duos: USD 12 each
Mini Gliterally Obsessed trio: USD 12
Two Full size of Gliterally Obsessed: USD 8 each
Birthday Treat super shock shadow: free with any purchase while stock lasts

Now, let’s break it down one by one!

Main Squeeze Eye Shadow Palette

In every CP releases, of course the eye shadow palette is the star of the collection. This palette is meant to be a red monochromatic palette, and it’s an addition of their currently existing monochromatic palettes, such as Brown Sugar, Ooh La La, It’s My Pleasure, and Just My Luck.

image courtesy: colourpop

Apparently, this was a highly requested monochromatic palette, and I was actually one of them who requested a red palette, so I’m not complaining. I love red, and I personally don’t have anything like this in my collection. I’m currently liking the 9-pan palette as I can create a quick look without having to think much. Since this one is right up my alley, this is the first item from this collection that I know I’ll pick up!

image courtesy: colourpop

However, after looking some swatches and reviews online, I must admit that a lot of the shades in this palette are somewhat ended up looking so similar once applied on the eyes. It’s also lacking in depth. There is no light enough or deep enough shade. If you look this palette as a whole, it’s full of medium and transitional shades only. The darkest shade which is the one on bottom right corner (“red bottoms”) could’ve been even deeper. And I can’t tell which one is the lightest shade, the 1st one (“frose”), or the 6th one (“big gulp”)?

Aside from that, some also mentioned that since it’s a watermelon themed palette, there should be a green, creme, and black shades. I personally don’t mind the fact that even though they claimed it to be a watermelon palette, it’s only consists of red colors. I’m sure they want to add this palette to the monochromatic palettes family without having to release another red-only palette.

With that being said, I did pick up this palette! This is my favorite item from this collection, the packaging is stunning, and the fact that it’s a 9-pan palette is also practical. I can’t wait to create all-red looks using it!

Best Served Chilled Bundle

This bundle is a collaboration with CP sister skincare brand, Fourth Ray Beauty (FRB). It consists of Watermelon Face Milk, Watermelon Seed Oil, and Watermelon flavored Lippie Scrub. Watermelon Seed Oil is previously existing product from FRB, while Watermelon Face Milk is a new one, and Watermelon flavored Lippie Scrub is also a new product from CP’s Lippie Scrub line. By the way if you’re wondering, Watermelon Face Milk is a light weight moisturizer that’s supposed to be hydrating but non-greasy.

image courtesy: colourpop

I’ve been wanting to try FRB products and CP lippie scrubs, but since I’m on a low buy year, I can’t just buy them whenever I want. I have to follow my low buy budget and schedule (PS: you can read my low buy rules here). So, when I saw that CP offers this bundle, which include literally everything I’ve been eyeing, I know I want to pick up this bundle. Additionally, from swatches and reviews I saw online, many people seems liking this bundle also.

This bundle retails for USD 24, while the actual total price of three of the items is USD 26, so we’re not really saving a lot of money by buying them in a bundle.

image courtesy: colourpop

I was actually a little bit iffy to buy liquid products internationally because I’ve read from several bloggers who ordered FRB stuffs that their stuffs came leaking (I read from my friend AlwaysCleia and PolishedAndInspired). I wish that they are sold individually so that I can pick up only the lippie scrub which doesn’t have high risk of leaking. But, since I’ve been wanting to try FRB products for a long time, I decided to pick up this bundle and just hoping for the best that there won’t be any spills during the shipping! ><

Liquid Lipsticks Bundles

There are so many liquid lip products within this collection and I like it since it’s very suitable with the theme. The three liquid lip bundles are: Sweet Crush, Slice of Life, and Our of Your Rind.

image courtesy: colourpop

Let’s talk about them one by one!

Slice of Life

image courtesy: colourpop

This bundle consists of one ultra glossy lip (UGL) in “Fresco” and one ultra BLOTTED lip (UBL) in “Swing Away”.

image courtesy: colourpop

It’s been a long time since CP released a new shade of ultra blotted lip so I’m very excited to try it. But I’m actually not a glosses type of girl. I like lip products that are pigmented and not sticky. If they were sold individually, I would’ve pick up only the UBL. But since they are only available in bundle (as of now), and luckily the UGL here is the only one that actually has color in it among the three bundles, I decided to pick up this bundle. I don’t hate glosses so I will just wear it from time to time.

Sweet Crush

image courtesy: colourpop

This bundle consists of one UGL in “Granita” and one ultra MATTE lip (UML) in “Sherbert Shop”.

I actually really like Sherbert Shop, it’s the type of lip color I like to wear. But since it’s only sold in a bundle, and I rarely wear glosses especially clear glosses, I decided not to pick up this bundle. Were they sold individually, I think I might’ve picked up only the UBL from previous bundle and the UML from this bundle.

Out of Your Rind

image courtesy: colourpop

This bundle consists of one UGL in “Scorcher” and one UML in “On The Grill”.

I don’t wear a lot of hot pink or fuchsia matte lippies because I find it too “in-your-face”. If the shade On The Grill was in UBL formula, I don’t mind it since UBL looks more muted than UML. I also rarely wear glosses, so this bundle is a pass from me. But I still think it’s a pretty color. I just hope it was in different formula.

Melonade Ultra Matte Lip

image courtesy: colourpop

I actually can’t justify why they include a single UML with only one shade option. I really like the color, tho, it’s right up my alley. But if they want to include a single item, there is one item I think is better than one shade of UML. They should’ve included a true red loose pigment! It much more makes sense to include a single loose pigment than a single UML that’s already available in bundles, too. But this is only my suggestion, I’m sure they had their own justification.

Honestly, if all of the items here were available as singles, I think the ones I picked up would be the watermelon lippie scrub, UBL in Swing Away, UML in Sherbert Shop, and this one. Since I have limited budget, I decided not to pick this one up, although I really really want to pick it up also 😥

Big Slice So Juicy Plumping Gloss

image courtesy: colourpop

As I mentioned before, I don’t usually wear glosses, let alone a thicker one like this. I personally think the color is pretty and really suits the theme. I actually considered to pick this up because I think this time might be a good time to try this plumping glosses. But since I have a limited budget, this one didn’t make the cut.

Supernova Shadow and Mini Gliterally Obsessed Duos

It’s been a long time since CP released new shades of supernova shadow. The last time was in their collaboration with Zoella. I never tried a supernova shadow before, so I can’t say much about it. I imagine it’s just like a usual liquid shadow.

Gilterally obsessed (GO) is not a new product, but this time they released it in a mini size which I think is a clever idea! The full size is 15 g/ 0.53 oz and retails for USD 7.5. The mini is 3 g/ 0.11 oz, and if we break it down from this bundle, since supernova shadow retails for USD 8, this GO mini’s value is around USD 4.5. If you wanted to try it since before but not quite ready to commit to a full size, this could be your chance. But you might want to keep in mind that you pay around half of full size price with the amount of 1/5. Of course we can’t always value a product based on their weight only since there’s also packaging that contributes to the price. But I think I just want to mention this in case it helps you decide on whether to buy the mini or not.

There are three of these duos, they are Dear Summer, Sandia Smash, and Slip N’ Slide.

image courtesy: colourpop

Dear Summer

image courtesy: colourpop

This bundle consists of “Wish Me Luck” GO and “Sand Castle” supernova shadow. Wish Me Luck is an existing GO shade but Sand Castle is a new one.

I was actually intrigued to try this since I never tried a supernova shadow and GO before. But I need to consider whether I will get a lot of use out of it. On daily bases when I go outside, I wear hijab and my whole body is covered except my face and my palms. On the other hand, GO is intended to use on the body or maybe face except the eye area. However, there’s not many part of my body that is shown. The highest possibility is only to use it around my face or my eyes (which is not safe). But I can’t justify going to a mall wearing glitter on my face XD. So although I like the shades of this supernova and actually don’t mind wearing glitter, I don’t think I can get many use out of it. So I decided to pass on this bundle (and also any glitter products within this collection).

Speaking about the bundle itself, I think the shade of supernova shadow in this one is the most consistent within this whole collection, which is around red and coral color family. The other two bundles are too pink-y and purple-y, which I think a little off to be paired with the palette if you want to wear them together.

Sandia Smash

image courtesy: colourpop

This bundle consists of “Avenue of The Stars” GO, which also an existing GO shade, and “Ice Pop” supernova shadow, which is a new one. I actually really like the glitter since it’s very colorful, and I do think the supernova shadow’s shade is also pretty, and the overall shade of both of them quite matches. But again, since I won’t be wearing them a lot, I decided to pass on this one.

Slip N’ Slide

image courtesy: colourpop

This bundle consists of “Disco Lady” GO, which also an existing GO shade, and “Hazy” supernova shadow, which is a new one. Among the three bundles, I think the supernova shadow in this one doesn’t quite match the theme. It’s still a pretty shade, so if you like the shade alone without considering the whole theme in this collection, I’m sure you’ll be happy to have it! I also passed this one with the same reasoning as I mentioned above.

Mini Glitterally Obsessed Trio

image courtesy: colourpop

This trio consists of three mini GO retails for 12 USD. Each of them is 3 g/ 0.11 oz and if we break it down from the bundle’s price, each would be USD 4. The shades are “Starfire”, “Star Party”, and “Keep it Plutonic”, which all of them are existing shade. If you don’t want the supernova shadow bundle, you can have this instead. I myself didn’t pick this one up.

Full Sized Gliterally Obsessed

image courtesy: colourpop

There are two new GO shades in this collection which are “Trippin on Skies” (the left one from image above) and “Bring The Heat” (the right one from image above). They are just like typical CP GO that has been released before. I can’t say much about it since I never tried any of them. I also passed on this one.

Free Birthday Super Shock Shadow

image courtesy: colourpop

Just like CP’s previous birthday celebration, they give this super shock shadow (SSS) as a freebie with every purchase made during the birthday period. I love SSS and this color is perfect for this collection. I obviously get it for free with my purchase and can’t wait to play around with it!

Additional Bundles

Besides the ones mentioned above, CP also offer some additional bundles. The first one is “Birthday Bash” which consists of four previous birthday-special SSS retails for USD 20.

Birthday Bash bundle, image courtesy: colourpop

I didn’t pick this up because I have limited budget and for this purchase, I decided to pick up products I never tried before such as FRB stuffs, lippie scrub, and UBL, so this one didn’t make the cut. But now I’m kinda regretting myself by not picking this one up. They are special SSS and not sold in singles anymore so I should have pick this up to complete my collection. Now I only hope they make this bundle a permanent so I can pick it up a little bit later 😥

The next bundle is “Sweetest Fling” which consists of Main Squeeze palette, Melonade UML, and Big Slice Plumping Gloss. This one retails for USD 26, which actually doesn’t save any money.

image courtesy: colourpop

The next bundle is “In Season” which consists of Main Squeeze palette, Best O liner, and Get Paid liner retails for USD 20. I actually considered to pick this up since it saves USD 3. But after considering the liners included here, I think I don’t really want them at the moment.

image courtesy: colourpop

Overall Thoughts

So that is it guys my thoughts about CP 2019 birthday collection. The ones I picked up are Main Squeeze palette, Best Served Chilled bundle, Slice of Life bundle, and Birthday Treat SSS. Overall, I really love the theme and in my opinion they executed it well with the selection of products, the graphic design, and the product/ shade names. There are some elements that could’ve been better, such as a wider range of reds in the palette, adding another type of product outside the bundle instead of one single shade of UML, and selling the products individually so that we could choose them more freely. In the end, I am still happy with my purchase and can’t wait to play around with it!

20% Discount Code

This is what I promised you guys. I have a referral link so that you can get 20% off your FIRST purchase only. This is not an affiliate code but I will get also 20% off my next purchase if you use this link to make your FIRST EVER purchase with CP. So it’s a win win for us!

https://www.talkable.com/x/boSyX0

This code (as far as I’m aware) is applied for all Colourpop’s products including new arrivals. So it’s a very good deal! Please feel free to use it or not. I really appreciate if you decided to use my referral link to make your purchase! ^^

image courtesy: colourpop

That’s all for today’s post! Now let me know what you think about this collection. Did you pick anything up? Which is your most favorite product? Or did you completely skip this collection? Please comment below!

I’ll see you on my next post!

Ramadan Culture that Confuses Non Muslims

Hey, everyone!

It feels like years since the last time I posted on this blog, while actually it’s only been two weeks! As I mentioned on this post, it’s a little bit hard for me to keep my old schedule to write blog posts since I got a new job. It’s actually even worse now because a relative who stays in my house and helps me take care of my son while I’m working went to her hometown for Ramadan and Eid (biggest Muslim celebration in a year). So basically I will be a single fighter until after Eid. Thank goodness my mom lives in nearby city so she will come help me every couple days in a week. That’s why I took a break from writing for two weeks just to let my self ‘breathe’ a little bit amidst this whole situation.

Speaking about Ramadan and Eid, last week’s Sunday evening (May 5th, 2019) marked the start of Ramadan month this year according to Islamic calendar. If you don’t know what Ramadan is, I found this article from Google where you can read simple and short but clear explanation about Ramadan. Ramadan month lasts for 30 days, and after that, we, Muslims, will have Eid al-Fitr celebration that usually takes up to one week long. So when I said my relative who helps me take care of my son is in a long holiday for Ramadan and Eid, it means I have to juggle between my son, my teaching job, and this blog all alone for around 5 weeks. I actually don’t know how I can handle that so if you’re a busy mom like me, please give me some advice!

In today’s post, since we are in the topic already, I thought I want to share with you my Ramadan experience among many people from different nations and ethnicity during my stay in Japan for three years. As Japan is a Muslim-minority country, not many people (Japanese or other non-Muslim foreigners who live in Japan) are aware about Ramadan’s customs. So I thought it would be interesting to share what non-Muslims think about Ramadan according to my experience. I hope you don’t mind that I take you to a trip down my memory lane so that you will get to know me little by little!

Now, let’s get started!

No Eating and Drinking During The Day

While non-Muslims in Indonesia (as Muslim-majority country) are aware about what Muslims do during Ramadan, that’s not the case for my Japanese and foreigner friends in Japan. When they first heard about Ramadan and came to realize that I won’t be eating and drinking during the day for a WHOLE month, they were shook!

“Won’t you be dead if you aren’t drinking and eating for more than 10 hours?” was the most common question I got from my friends. The fact is, we won’t (in God’s will). Our body can hold up to three weeks without food and up to four days without water (according to this article). So don’t worry, 12 hour-ish without food and water is doable!

The fact is, we must not drink and eat (or simply called ‘fast’) from sunrise until sunset, so the time will be different around the globe. In Indonesia, since we are near equator, we are so lucky to have similar hour-long between day and night. But during my stay in Japan, Ramadan always occurred in summer, so the day was longer than the night. At that time, I had to fast for about 17 hours. But I know it wasn’t the hardest fast known. In other countries, they have to fast for nearly 20 hours.

The next common question I got was, “Why would you sacrifice yourself like that just because your religion told you to do so?” First thing first, ‘fasting’ not only about ‘not drinking and eating’ only, but also about ‘abstaining our self from humanity desire or pleasure, such as sex, swearing, arguing, or smoking’ because this month is a special month for worshiping and getting closer to God. The fact is, personally, because I’m used to do it since I was a kid, I don’t feel any pressure to do it, but i must admit that fasting 17 hours in Japan was much harder than 12 hours in Indonesia. And about the ‘sacrifice’ thing, I feel like by abstaining myself from pleasure activities, I can focus more on my spiritual dedication. I always feel like I became a better person by the end of Ramadan by not arguing with people or restraining my anger. So definitely I must say rather than sacrificing myself by being hungry all day long, I feel the significance of my personal growth is worth the struggle (I hope it makes sense!).

Eating before Dawn

So how do we survive fasting during the day? We actually eat before dawn, and by ‘dawn’ here is also on different times around the world. In Japan when Ramadan lasted on summer, the dawn was 02.30, while in Indonesia it is typically around 04.30.

You might think that we eat a lot during this time, but actually, it’s hard to eat a lot while we’re still half asleep >< In the end, we can only eat just enough to start our day without looking too miserable.

I personally tend to avoid too much carbo or fat. It’s better to take a lot of protein and fiber as it slows down the digestion process, hence makes us feel full a little bit longer. I also make sure I drink a lot water.

Getting Together and Eating after Sunset

One of our favorite time would be none other than the time when we can break our fast. It is around 19.00 in Japan during summer, and 17.30 in Indonesia.

During this time, we usually get together with our family and friends and break our fast together. In Japan, in the city where I lived in, we have huge Muslim community because my city has some universities and research centers, so I can safely say that my city was very foreigner friendly. We have one mosque that is actually not very big, but because of that, we feel very close to each other.

During Ramadan, we had break-fasting schedule almost everyday in the mosque, and in every schedule, we took turn to prepare the food according to our countries. We have Indonesian, Malaysian, Arab, Egypt, Indian, Bangladesh, and Pakistan community when I lived there, so I’m so grateful to be able to experience so many different Ramadan dishes from around the world. We sat together without distinguishing nations and ethnicity, and we just felt as one big Muslim brothers and sisters :’)

Break-fasting menu from Arab Community, photo by me
Break-fasting menu by Pakistan Community, photo by me
Break-fasting menu by Bangladesh Community, photo by me
Break-fasting menu by Indonesia & Malaysia Community, photo by me

So sorry for the low quality photos, guys. I retrieved those photos from my personal IG account. I took them around 2013-2015 when I was still living in Japan, at that time I didn’t know how to make objects look aesthetic on photos. I basically just took the photos for documentary purpose. But I’m sure you get the idea! XD

Praying until Late at Night

And after break-fasting, we had a special prayer that was longer than usual (and by ‘usual’ here I mean months other than Ramadan month). This prayer actually can be done alone in our own home or together in the mosque. But definitely it feels different when we pray together in the mosque and it feels more Ramadan.

This prayer usually started around 21.00 in Japan because of the summer time, while in Indonesia it started around 19.30. The length of the prayer is actually different according to each mosques’ custom. In our mosque in Japan, this prayer usually finished around 22.30. But this is not an obligatory prayer (like I’ve said before). There were several breaks in the middle of the prayer, so we can go home during those breaks if we want to. Or we can completely skip it from the beginning and do it alone in our home.

So after the prayer, me and my friends usually rode our bicycle together from the mosque to our apartment or dorm in Japan. Even though it’s almost midnight, it felt so nice to be with friends, riding our bicycle in the middle of the road. How I missed those time when I was young and free XD

So those are our Ramadan culture, especially when I was living among many Muslims from different countries in Japan. This is such a rare experience and I can’t thank Allah (God) enough for giving me the opportunity to meet my brothers and sisters from around the world and share Ramadan together for once in my lifetime. When I think that I might not be able to repeat this experience, I am a little bit sad. But at least, I have this memory to remember forever :’)

That’s all guys for today’s post. I hope you enjoyed reading it! If you’re not Muslims, do you find this culture interesting? Or maybe do you have some Muslim friends and know how their Ramadan culture is? Are they different than mine? If you’re Muslims, where are you from and how is your Ramadan culture? Share it on the comments below because I’m really interested to know about that, too!

See you on my next post!